IMALlama

joined 1 year ago
[–] [email protected] 1 points 1 minute ago

You've discovered cold brew!

[–] [email protected] 5 points 2 hours ago

If you have the time there's no harm, but you're probably going to want to disassemble the steps to repair it halfway well.

Depending on the weight of the person/people who will be be using it, you might want to rethink the design or make the steps out of something thicker/beefier. Since the two treads are essentially cantilevers, the riser and torque is all that's prevent the far end of either step from collapsing. I don't think a butt joint is good enough here, even if it has a backer (as the pictures show). A finger joint between the treads and the riser, with many smaller fingers, is probably your best bet. You'll probably want a table saw and a jig/slead to cut them, unless you're familiar with a good alternative and/or have the skill and time to do it with hand tools.

[–] [email protected] 1 points 12 hours ago

Huh, any particular ABS brand(s)? I am tempted to grab a roll. I've been running polymaker's ASA and other than warpage on big parts with my lower chamber temps (yay big printer with lots of enclosure surface area) it prints fairly well.

I run the filter inside an enclosed printer with an exhaust fan.

[–] [email protected] 3 points 1 day ago (2 children)

You're saying ABS is printing easier for you than ASA? That's interesting. From my limited understanding, ASA has the reputation of being easier to print.

What brands/blends? I've been printing basically only ASA and PETG for a little while now. Haven't tried ABS.

[–] [email protected] 0 points 2 days ago

Should your car ever wind up submerged in water a hammer could come in handy. Make sure it's a "break glass" type hammer, which has a point. Thick tempered glass is surprisingly strong.

[–] [email protected] 0 points 4 days ago

I sold the OM-1 today :( it was hard to pack up the two lenses especially, they feel very nice on hand. The A7III and A9II are not always responsive, especially when turning on, but man are they easier for me to chase my kids around with. I also sold the A7III. The A9II with a compact prime like Sigma's i series is actually more compact than the OM-1 with one of the 1.2 pros.

If you're willing to give Sony a shot, the OG A9 is worth a look. The A9II has the same sensor and the A9 has had a ton of firmware updates that put its AF performance on par with the A9II. The biggest differences I remember are the buttons (they feel slightly nicer on the A9II) and the addition of an Ethernet port.

[–] [email protected] 0 points 4 days ago

The perfect bag can be a never-ending quest. Good luck!

[–] [email protected] 4 points 4 days ago

It will decompose, but only it a hot compost pile.

To some extent, this means large scale composting, but you could theoretically do it at home if you live somewhere with four seasons (specifically fall) and have trees that drop leaves on your property or nearby. Let your grass get a bit taller as the trees start turning and mulch/bag the grass and leaf mixture. Bonus points if you have a ratio of 30 carbon (brown stuff) to 1 nitrogen (green stuff) by weight. "Normal" composting into. This is why big piles of fresh mulch get pretty warm and stream in the middle.

I don't know what it would take to break down PLA in compost, but suspect it would take more time than a typical home pile if you manage to get it hot. It would probably be benefit from shredding to speed things up, as would the rest of the stuff in a typical compost pile. Amusingly, your PLA is probably ripe for getting whacked with a hammer, or a hammer mill.

[–] [email protected] 0 points 4 days ago (2 children)

It's great that you're trying to carry your camera more often, presumably so you can use it. The only thing to keep in mind is that a buried camera will be hard to get your hands on. It might be worth considering a multi-chamber backpack at some point in the future.

Examples include Lowpro's fast pack and a whole bunch of Amazon brands.

[–] [email protected] 9 points 4 days ago

IMO there's little need to buy new in the computer world unless you want to do something silly like have a snapdragon x laptop or have the disposable funds to go the gaming rig route.

My desktop is a retired business workstation, a HP Z420. I bought it for $250, installed a smaller SSD ($100 new) for the OS + apps, upgeaded to the "best" Xenon that fit the socket ($150 used), upgraded to 64 GB RAM ($107 used, yay ECC memory being dirt cheap on the used market), and a 1070TI ($225 used, purchased just before covid).

It's more than fast enough for my needs still.

This was all about 4-5 years ago, so you could probably do even better with more modern hardware.

[–] [email protected] 0 points 5 days ago (2 children)

Do you live in a warmer climate and/or have radiator heat? From what I've read, carneverous plants like higher humidity and Midwest winters + forced air make for a pretty dry house.

Also, be careful with bottled water. They all have some level of minerals in them to get their flavor profile. That said, if you've been doing this for any period of time carry on!

[–] [email protected] 2 points 5 days ago

That looks like under-extrusion to me.

Here's the quick "tune your extruder" arc:

  1. E-steps. Mark your filament about 125mm from a known reference point, extrude 100mm, measure again. What percentage of 100 did you get to? Adjust your e-steps accordingly and try again. You should never have to mess with this number ever again unless you physically change parts in your extruder. More detailed guide
  2. Temperature. Print a temp tower. Choose the temp that looks the best and offers good layer adhesion. Your filament will extrude differently based on your extruder temp
  3. Flow rate / extrusion multiplier. This will require more typing from me, but there are a number of ways you can generate test prints for this, so check the linked guide. More detailed EM multiplier guide.

After you get #1, never touch it again unless you change things like your extruder gears. #2/#3 are a good idea whenever you start a new roll of filament, although I personally don't bother unless I'm trying a new material, brand, or color.


Klipper aborted the print with:

Heater extruder not heating at expected rate Transition to shutdown state: Heater extruder not heating at expected rate See the 'verify_heater' section in docs/Config_Reference.md

Before any of this started,I goobered my original Rapido, so I replaced it with a Rapido 2. It's been in the printer since April, but I haven't done a ton of printing with it. After the replacement, all was well for a while. At some point, Klipper started randomly tripping thermal runaway protection. The spikes were instantaneous, so I suspected a wire break. It wouldn't be my first and they're usually easy to find. I moved the tool head around trying to find it with no success. I pulled apart both cable chains (yay Voron) to look for the wire break and didn't find one. I flipped the printer updside down and connections at the MCU - everything was fine. I went through the hot end and inadvertently pulled the thermistor out of the m3 slug. Here's a stock photo:

Suspecting a potential wire break at the thermistor, I manipulated the wiring to no real effect. Inside the M3 bung was some dried white stuff, which I think was probably Boron Nitride Paste. I bought some more from Slice Engineering and reinstalled the thermistor.

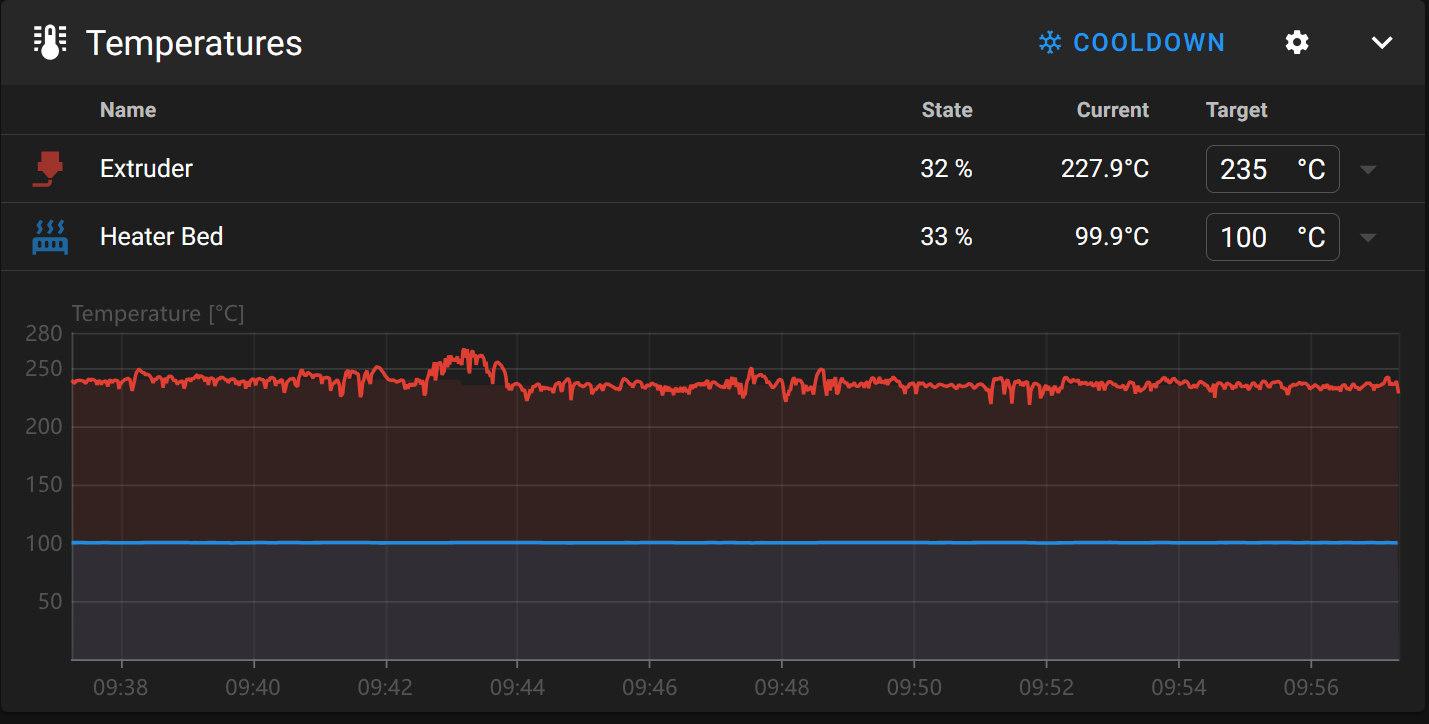
Two things changed after this. First, the terminator seems to be reading lower than it did before. I say this because I have a ton more stringing than I did previously. Second, the temperature is no longer spiking but it is doing this high frequency oscillation thing now.

The oscillation only happens once the printer is moving quickly. If it's still, or moving slowly, things are fine.

Thoughts? I'm suspecting the thermistor, but would like to troubleshoot if possible vs just throwing parts at the printer.


Title basically. I've been "long term renting" a few camera bodies by purchasing used gear with the intention of selling what I didn't want to keep. I'm now at the point of thinning the heard. I'm partially writing this for myself, but am more than open to feedback :)

The cameras in the post photo are an OM-1 and an A7 III, but I'm really comparing the OM-1 against an A9 II. The A7 III is generally a solid camera, but its mechanical shutter is somewhat loud to use in places like museums with the kiddos and its electronic shutter catches tons of banding from modern lighting. Both the OM-1 and the A9 II solve that problem, although the A9 II does so a bit better (yay faster readout).

What do I take photos of?

Candid kids (playing, sports, etc), some pets, some bugs, some plants, some landscape. But mostly kids in various states of motion.

What lighting do I shoot in?

In other words, do I really need the ISO/DR performance? There are a few answers to this question. First, I shoot in a wide range of lighting:

Second, when I shoot in lower light I am able to decrease my shutter speed and/or use fast glass to keep ISO fairly low:

Third, I am wary of needing to push ISO in the future for faster motion + lower light, but this isn't currently a concern.

What kind of lenses am I using these days?

For shorter distances, fast(ish) primes. On the long end, telephoto zooms.

On e-mount, I have a pair of Sigma 35mm lenses: their f/1.4 and f/2.0. The 2.0 is much more compact and is on the camera most of the time. I also have Sony's 50mm 1.8, which I will likely upgrade if I keep the camera. Closing out my e-mount collection is Tamron's 150-500.

On M43, I have the 25mm 1.2 pro and 12-40mm. I don't yet have a long telephoto, but will buy one if I decide to stick with the OM-1.

OM-1 Pros

  • Of the cameras in this comparison, the burst rate of the OM-1 is frankly nuts
  • Feels more mechanical than it is. Turns on nearly immediately, even when sitting for a long time, and its controls are all very responsive
  • New M43 glass is cheaper than FF glass, used M43 glass is very available
  • M43 is a much more macro friendly mount, especially once you factor in 2x FF equivalency. For example, the 12-40 has 0.3x magnification, but when you factor in that the sensor is half the size of a FF sensor this is equivalent to 0.6x
  • The promise of compact
  • The promise of fast AF

OM-1 Cons

  • Minor one first. Since the camera isn't very popular accessories are somewhat harder to find and/or have less verity available
  • Even when in focus priority, it will happily take photos that are out of focus. This seems to be more of an issue for humans than say birds, but I happen to want to take photos of humans
  • Human face/eye detect works fairly well as long as faces/eyes leave the frame when they're lost. If the face/eye stays in the frame, and the camera starts to lose focus, it will continue to indicate focus on the face/eye as it slowly goes soft
  • FF lenses can be even more compact once you get into FF equivalency, especially when you get into shorter focal lengths. More on this later
  • The depth of field preview thing bugs me. For those who haven't shot M43, their preview (eg waving the camera around to get framing) and focusing happens wide open. They only step down when you're taking photos. They do have a depth of field preview button you can use, but the workflow turns into: press button, camera steps down, focus, camera opens, take photo, camera steps down 'just in time'
  • If you want GPS coordinates in your photos the companion app is very silly. The OM-1 can encode GPS coordinates as you take photos, but only if you launch the camera app and record your location as you're walking around. This requires you to take an action in the app. Leaving the app in this mode will drain your phone battery. Sony/Nikon/Fuji simply require the companion app to be running in the background on your phone
  • This is a quibble, but in a series of photos the OM-1 will fiddle with exposure a lot more than any other camera I've used. It's easy enough to address in post, but it's somewhat distracting while culling two very similarly framed photos with slightly different expsorues

A9 II Pros

  • Very easy to use autofocus. Set it to tracking flexible spot M or L, aim the camera at the thing you want, engage autofocus, forget about it
  • If it loses a face eye, it tells you immediately and often before that face/eye is out of focus. I've taken very few out of focus photos with this camera
  • Preview and focus are stepped down, although it will occasionally go wide open to acquire initial focus. Once focus has been achieved it will step back down
  • Huge quantity of available glass to fit basically any need/use case
  • Ability to push ISO
  • Large ecosystem around the camera

A9 II Cons

  • The HMI is laggy, the camera can take a long time to turn on if it has sat for a while
  • Expensive glass
  • Physical size/weight of of lens when you get into bigger focal lengths

One sentence each

A9 II = very easy to focus on taking photos (framing, depth of field, etc)

OM-1 = the promise of compact, very fast

On compactness

On the shorter side of the focal range: Once you factor in FF equivalency (2x better total light gathering thanks to surface area, 2 stop depth of field difference), my 25mm f1/2 turns into a 50mm 2.5. This means that I can put something like Sony's 50mm 2.5 G or Sigma's 50mm F2 DG DN on the A9 II and have very comparable image quality with a more compact lens.

On the telephoto end, my 150-500 spends a lot of time between 350 and 500. It's a sharp lens, it focuses quickly, renders nicely, and I really appreciate 500mm. But it's heavy at 1.7 kg and the zoom ring is pretty stiff. The closest M43 lens to it are the pair of 100-400s. They will admittedly gain me quite a bit of reach, but I don't need that reach right now. Physically, they're not much smaller than the 150-500, but they're 600 grams (the Olympus) and 750 grams (the Panasonic) lighter respectively. I do wonder how sharp the Panasonic 100-400 is and am somewhat wary of the Olympus 100-400 since in Sony land its Sigma counterpart has the reputation for somewhat slow AF.


Years ago, nearly a decade ago in fact, my wife enrolled in a pottery class at our local community college. We planted a shrub while she was enrolled, dug up some clay in the process, and her professor let her make something with it and fire it. To everyone's surprise, it went smoothly.

Enter kids, increasing work responsibilities, etc. A decade passes. Along the way we discovered our yard is 2-3" of top soil followed by nearly 100% gray clay. There's no marbeling, basically no sediment, nothing. Just slightly sandy/gritty gray clay.

I recently buried a gutter downspout and added a French drain in our yard, so I trenched my way through a ton of clay. I set some aside, since our oldest kid is now messaging with clay at our community center.

Here's the quick rundown of how I processed it:

  1. Manually remove the topsoil layer
  2. Toss clay into a 5 gallon bucket
  3. Cover in water, let sit a day or so
  4. Mix with a grout/thinset/cement mixing paddle attached to a drill to break up the chunks
  5. Sive for coarse material, like roots. I used some burlap as a screen and poured between buckets
  6. After you've screened the clay, remove the excess water. You can just let the bucket(s) sit and wait for evaporation to do its thing, you can wait a day or two for some water to separate and pour it off, you can use some fabric you don't care about much as a cheesecloth, etc
  7. Once the clay is the appropriate consistency, make something!

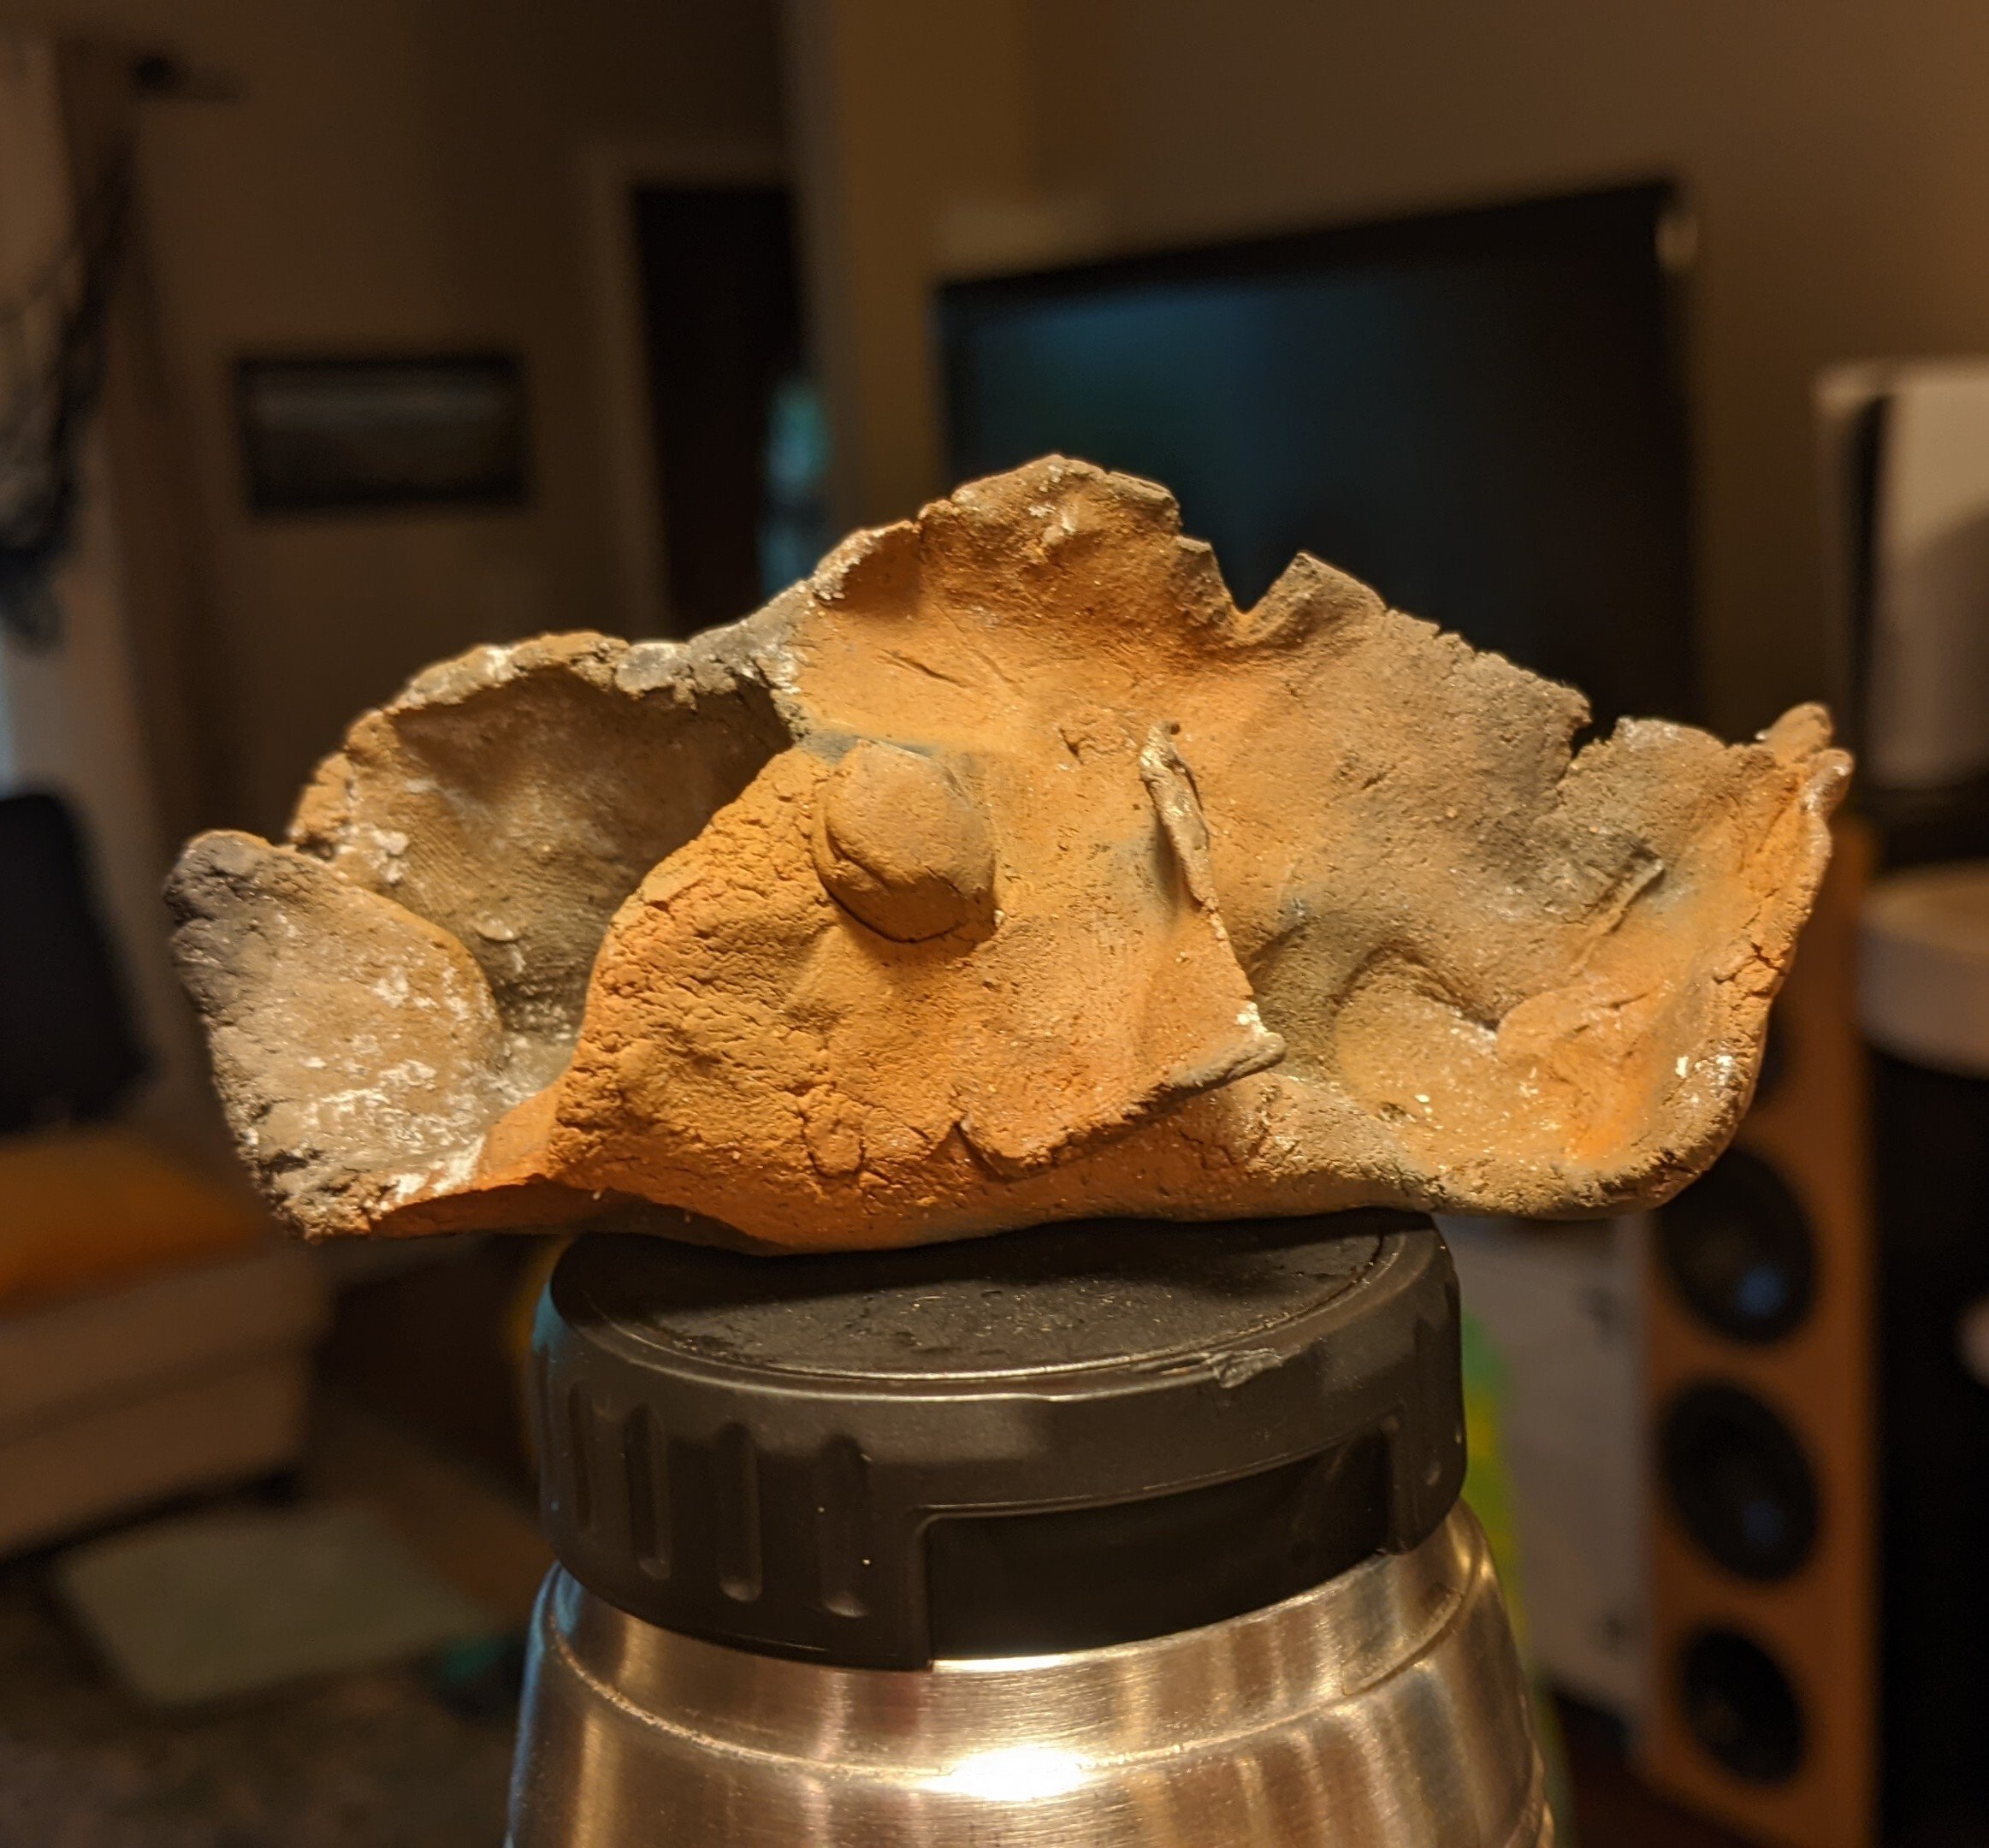
I made was a ceramic fish following the instructions of our oldest, who had just made something similar at the community center. The one pictured was meant to be the ugly sacrificial test piece before the "nice" one got fired, but our youngest broke the nice one into pieces, so I guess the ugly one is the nice one now.

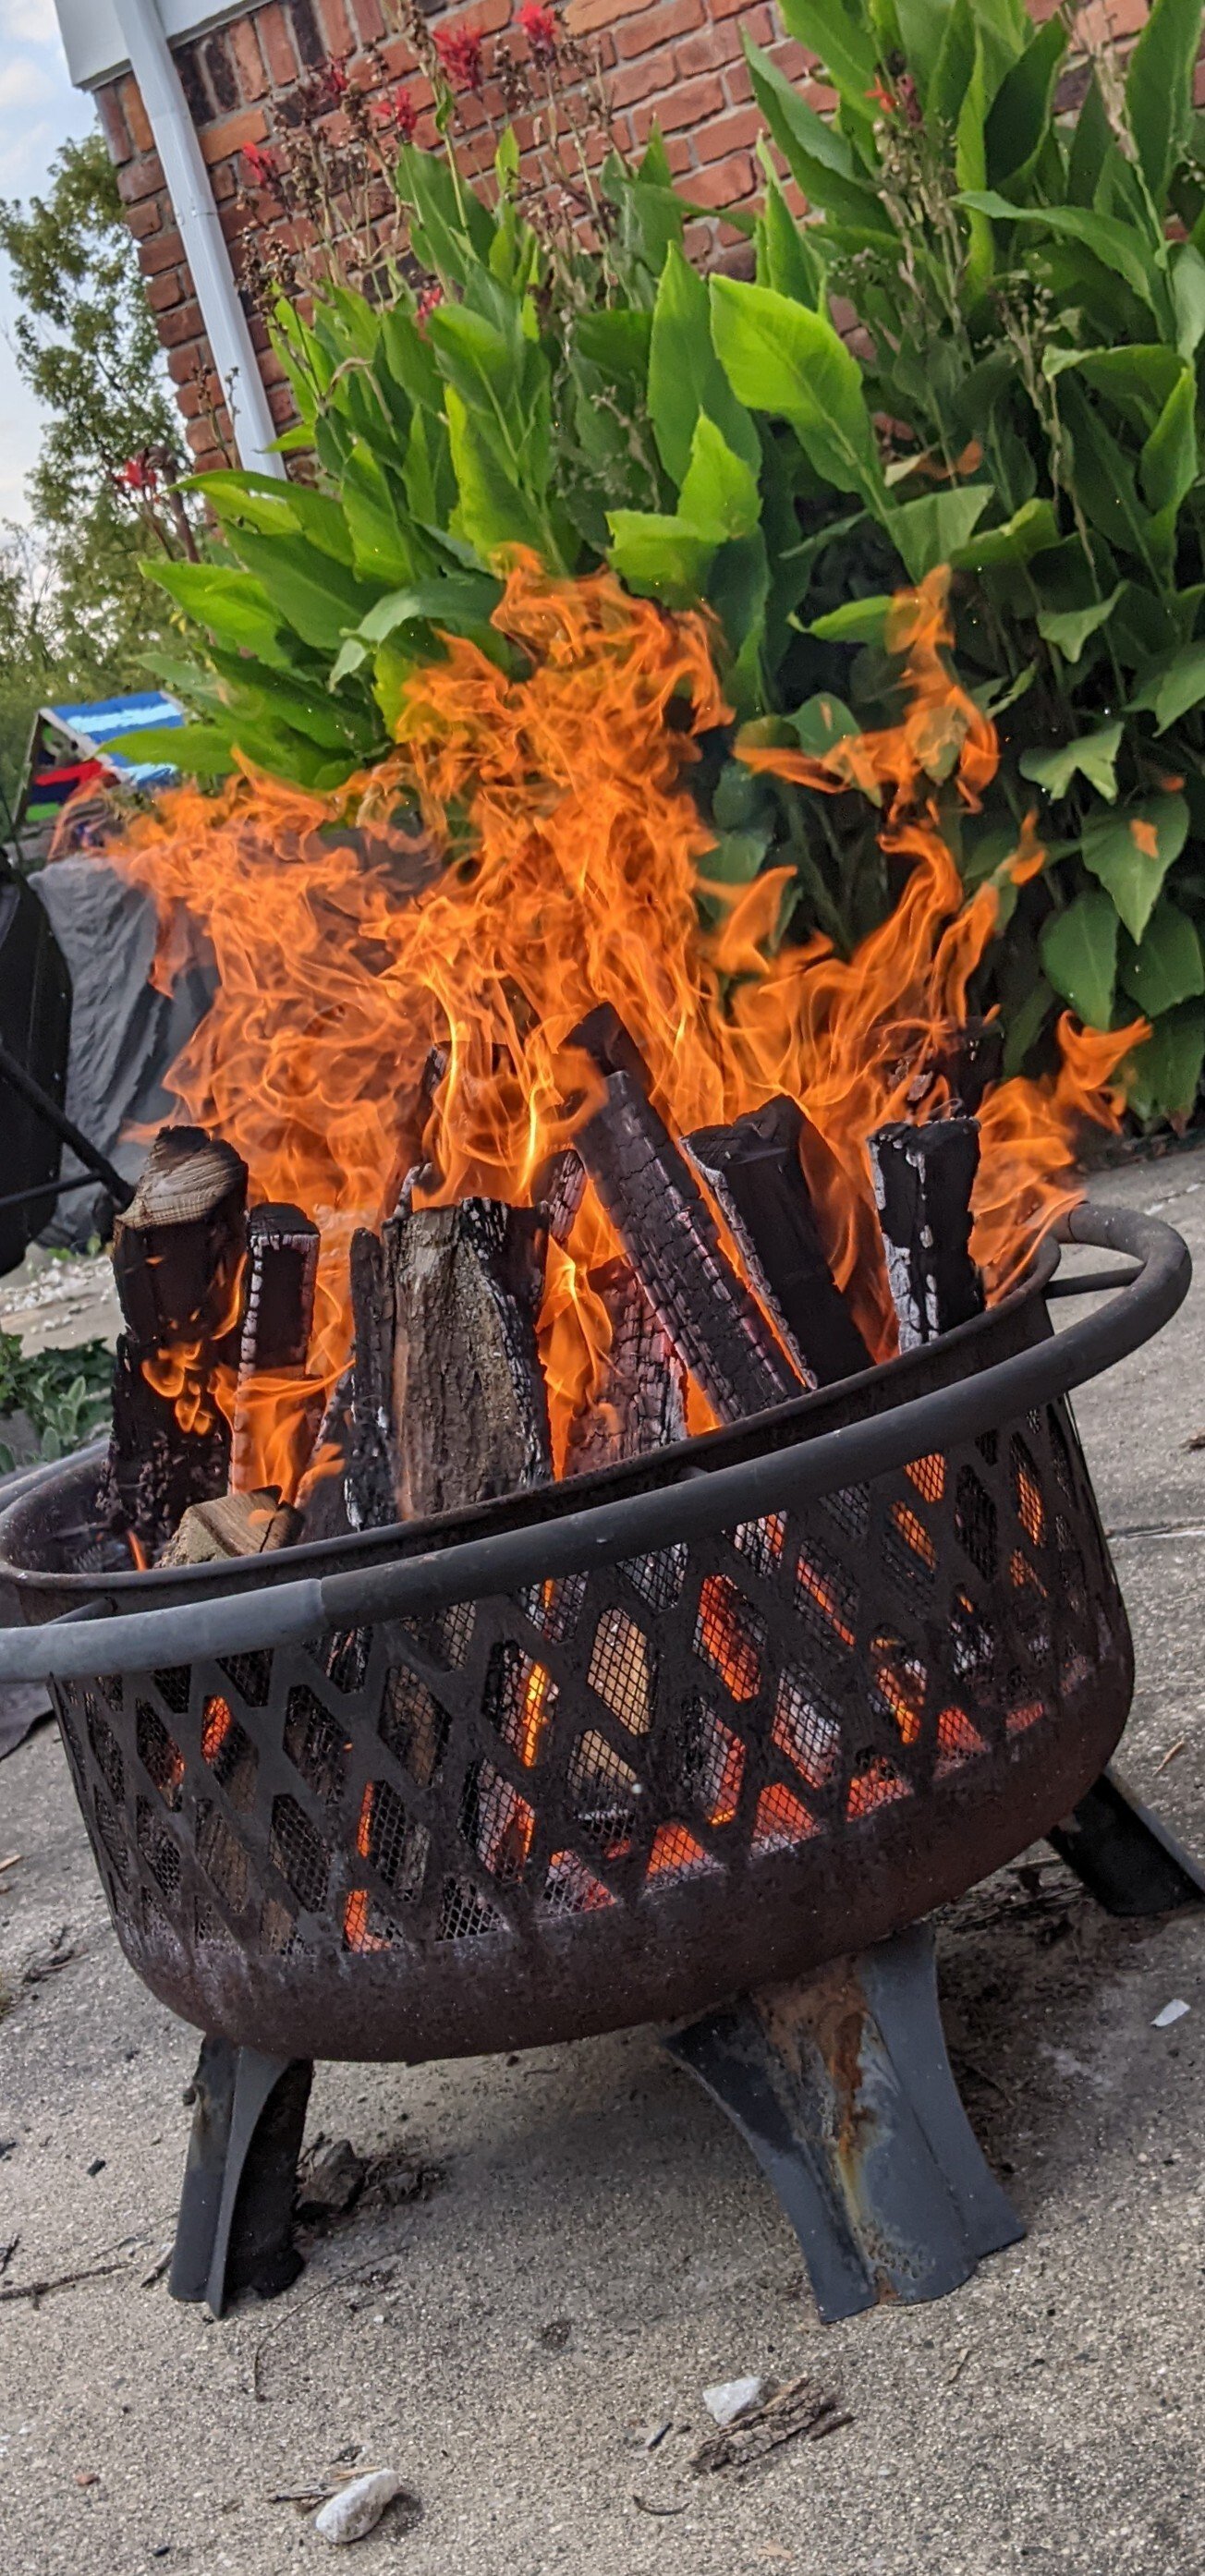
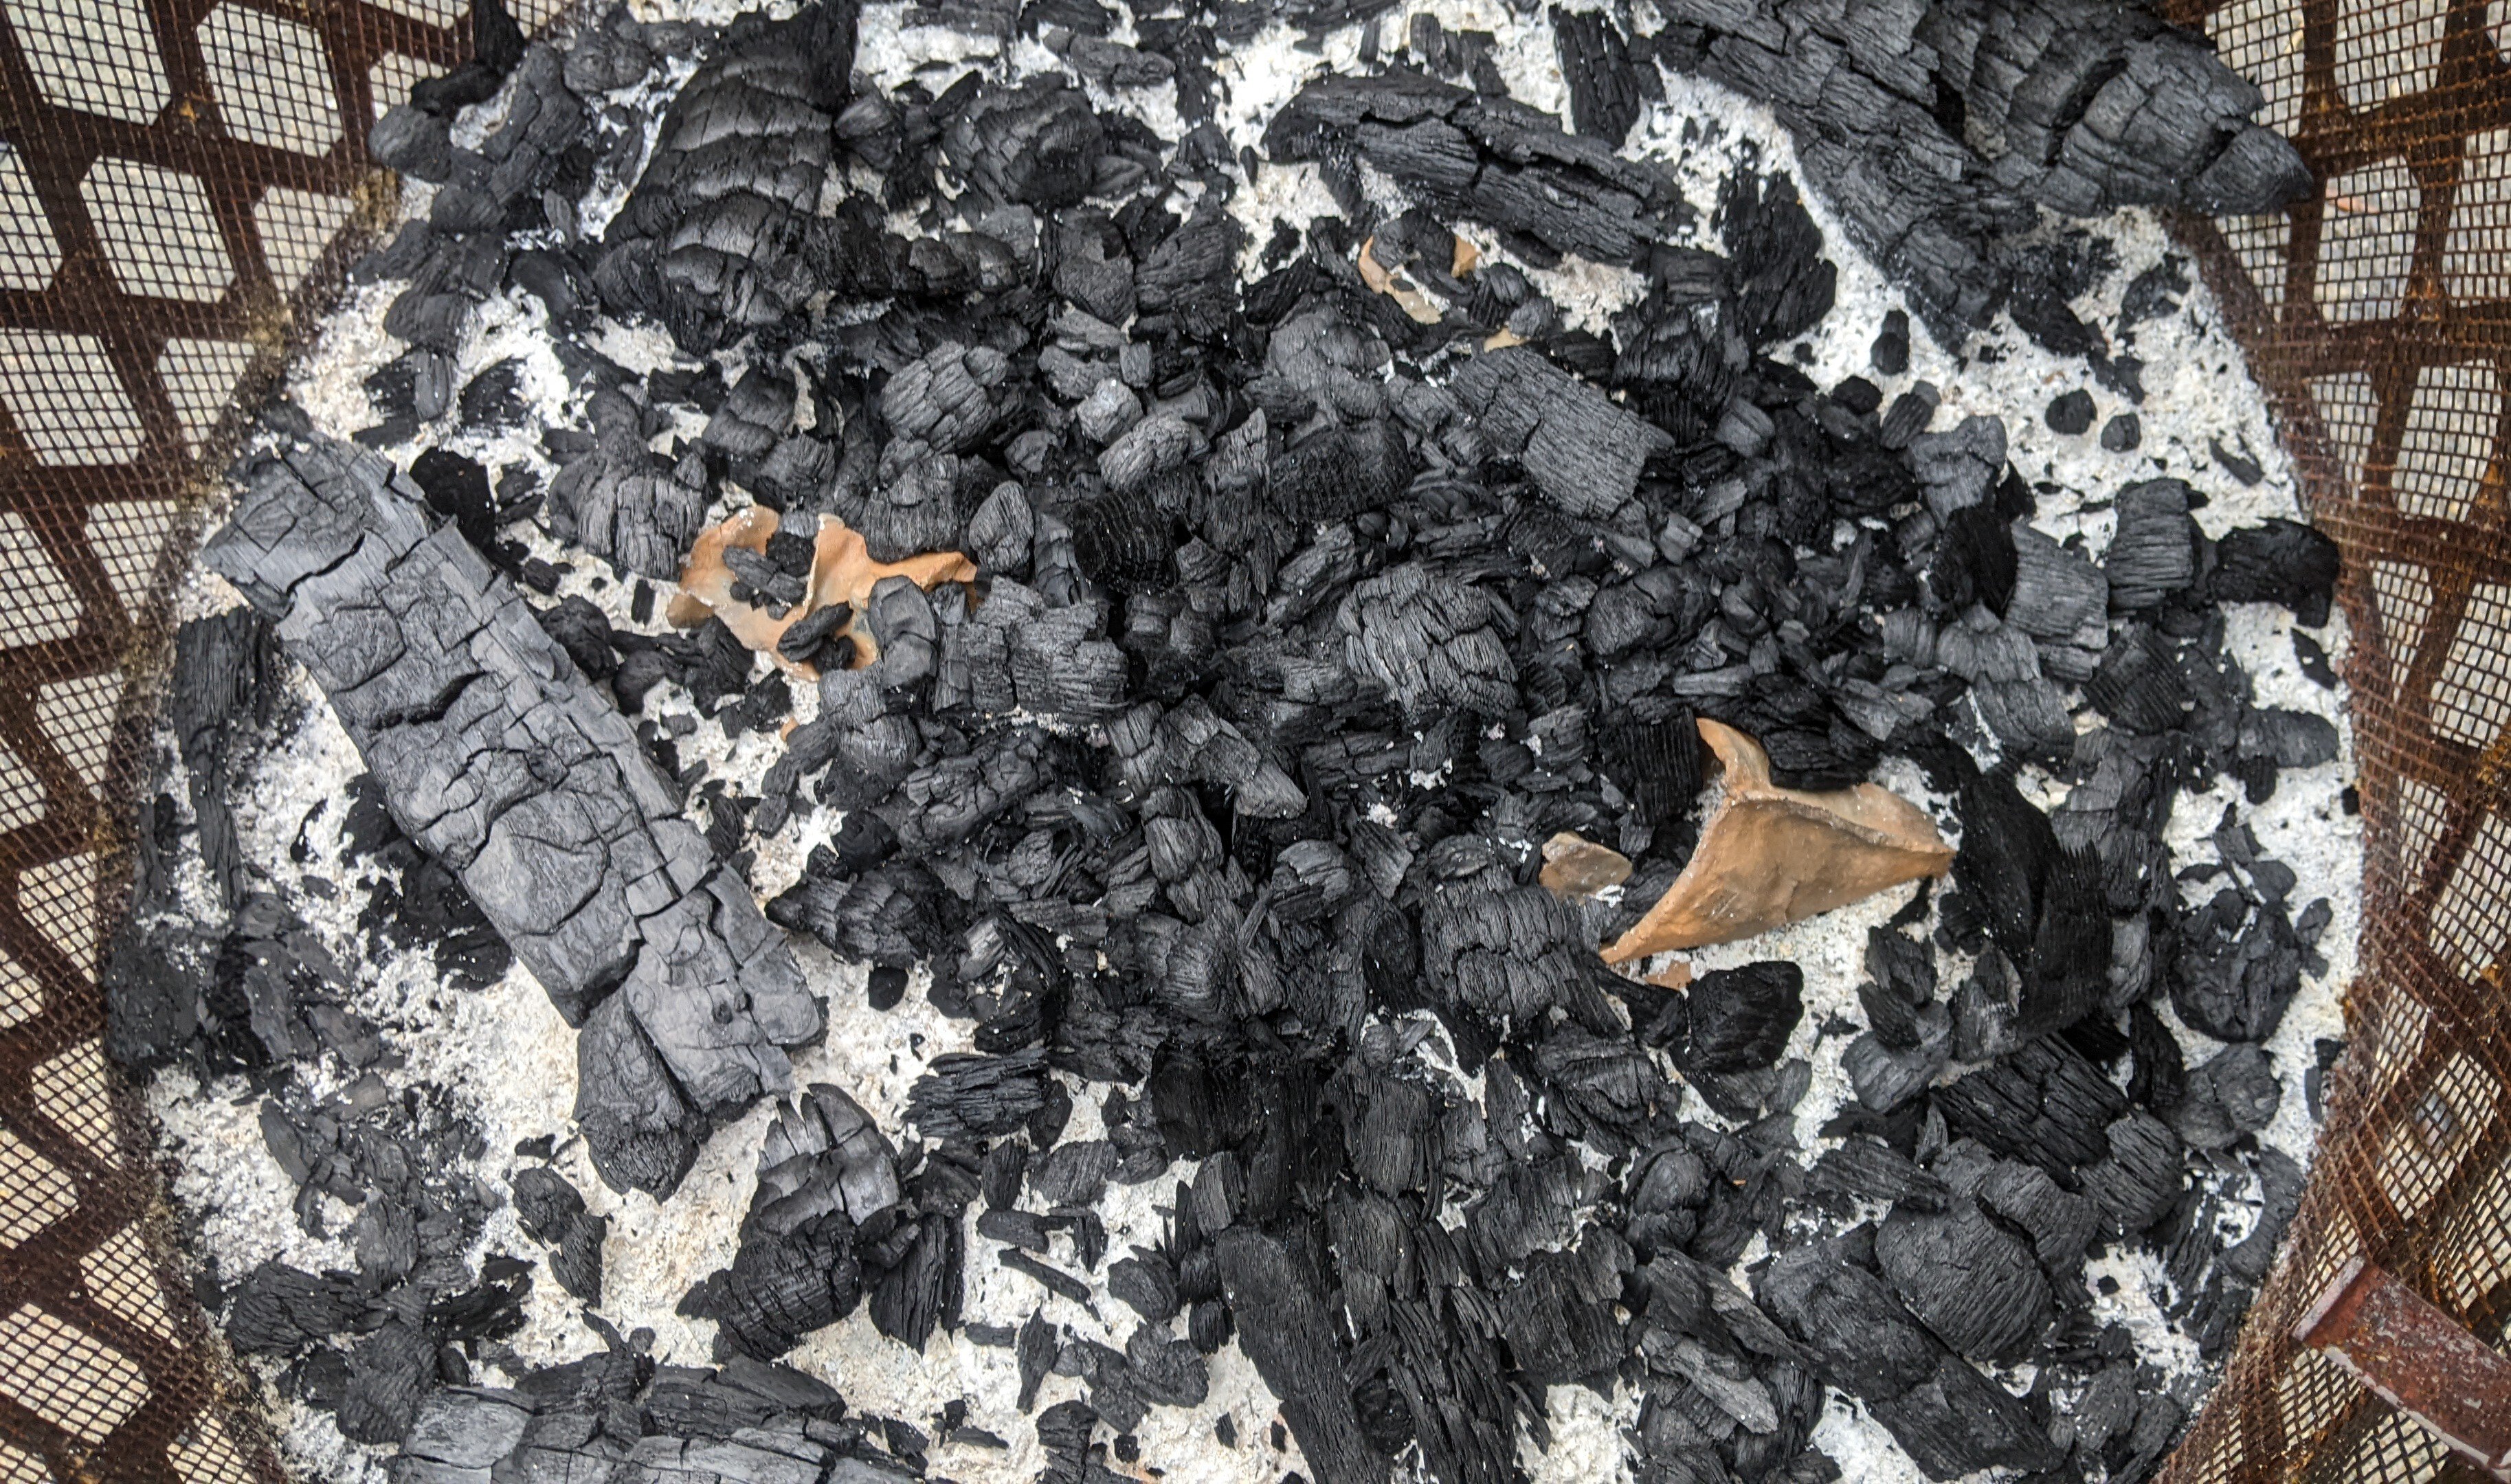
I left the fish under our porch for a few weeks to dry out. After that, I put them into our fire pit, lit a small fire to warm them up somewhat gradually, and then built the fire up over a half hour or so.

Burningaton:

Post burn:


OM-1 with Oly 25 f1.2 pro @ f/2.8

I remain on the fence about this camera, but it can take some pleasing photos if you get it to focus where you want it.


Not that big, but it would still be interesting. I pulled some honey locust from our firewood pile a few years back and incorporated it into a desk. It has a fairly boring grain pattern, but I like the color a lot.


If you look at the very bottom of the screen shot you can see that the home, search, etc buttons are cut off.

Happy to provide more info to help. I'm on a stock pixel 3a.


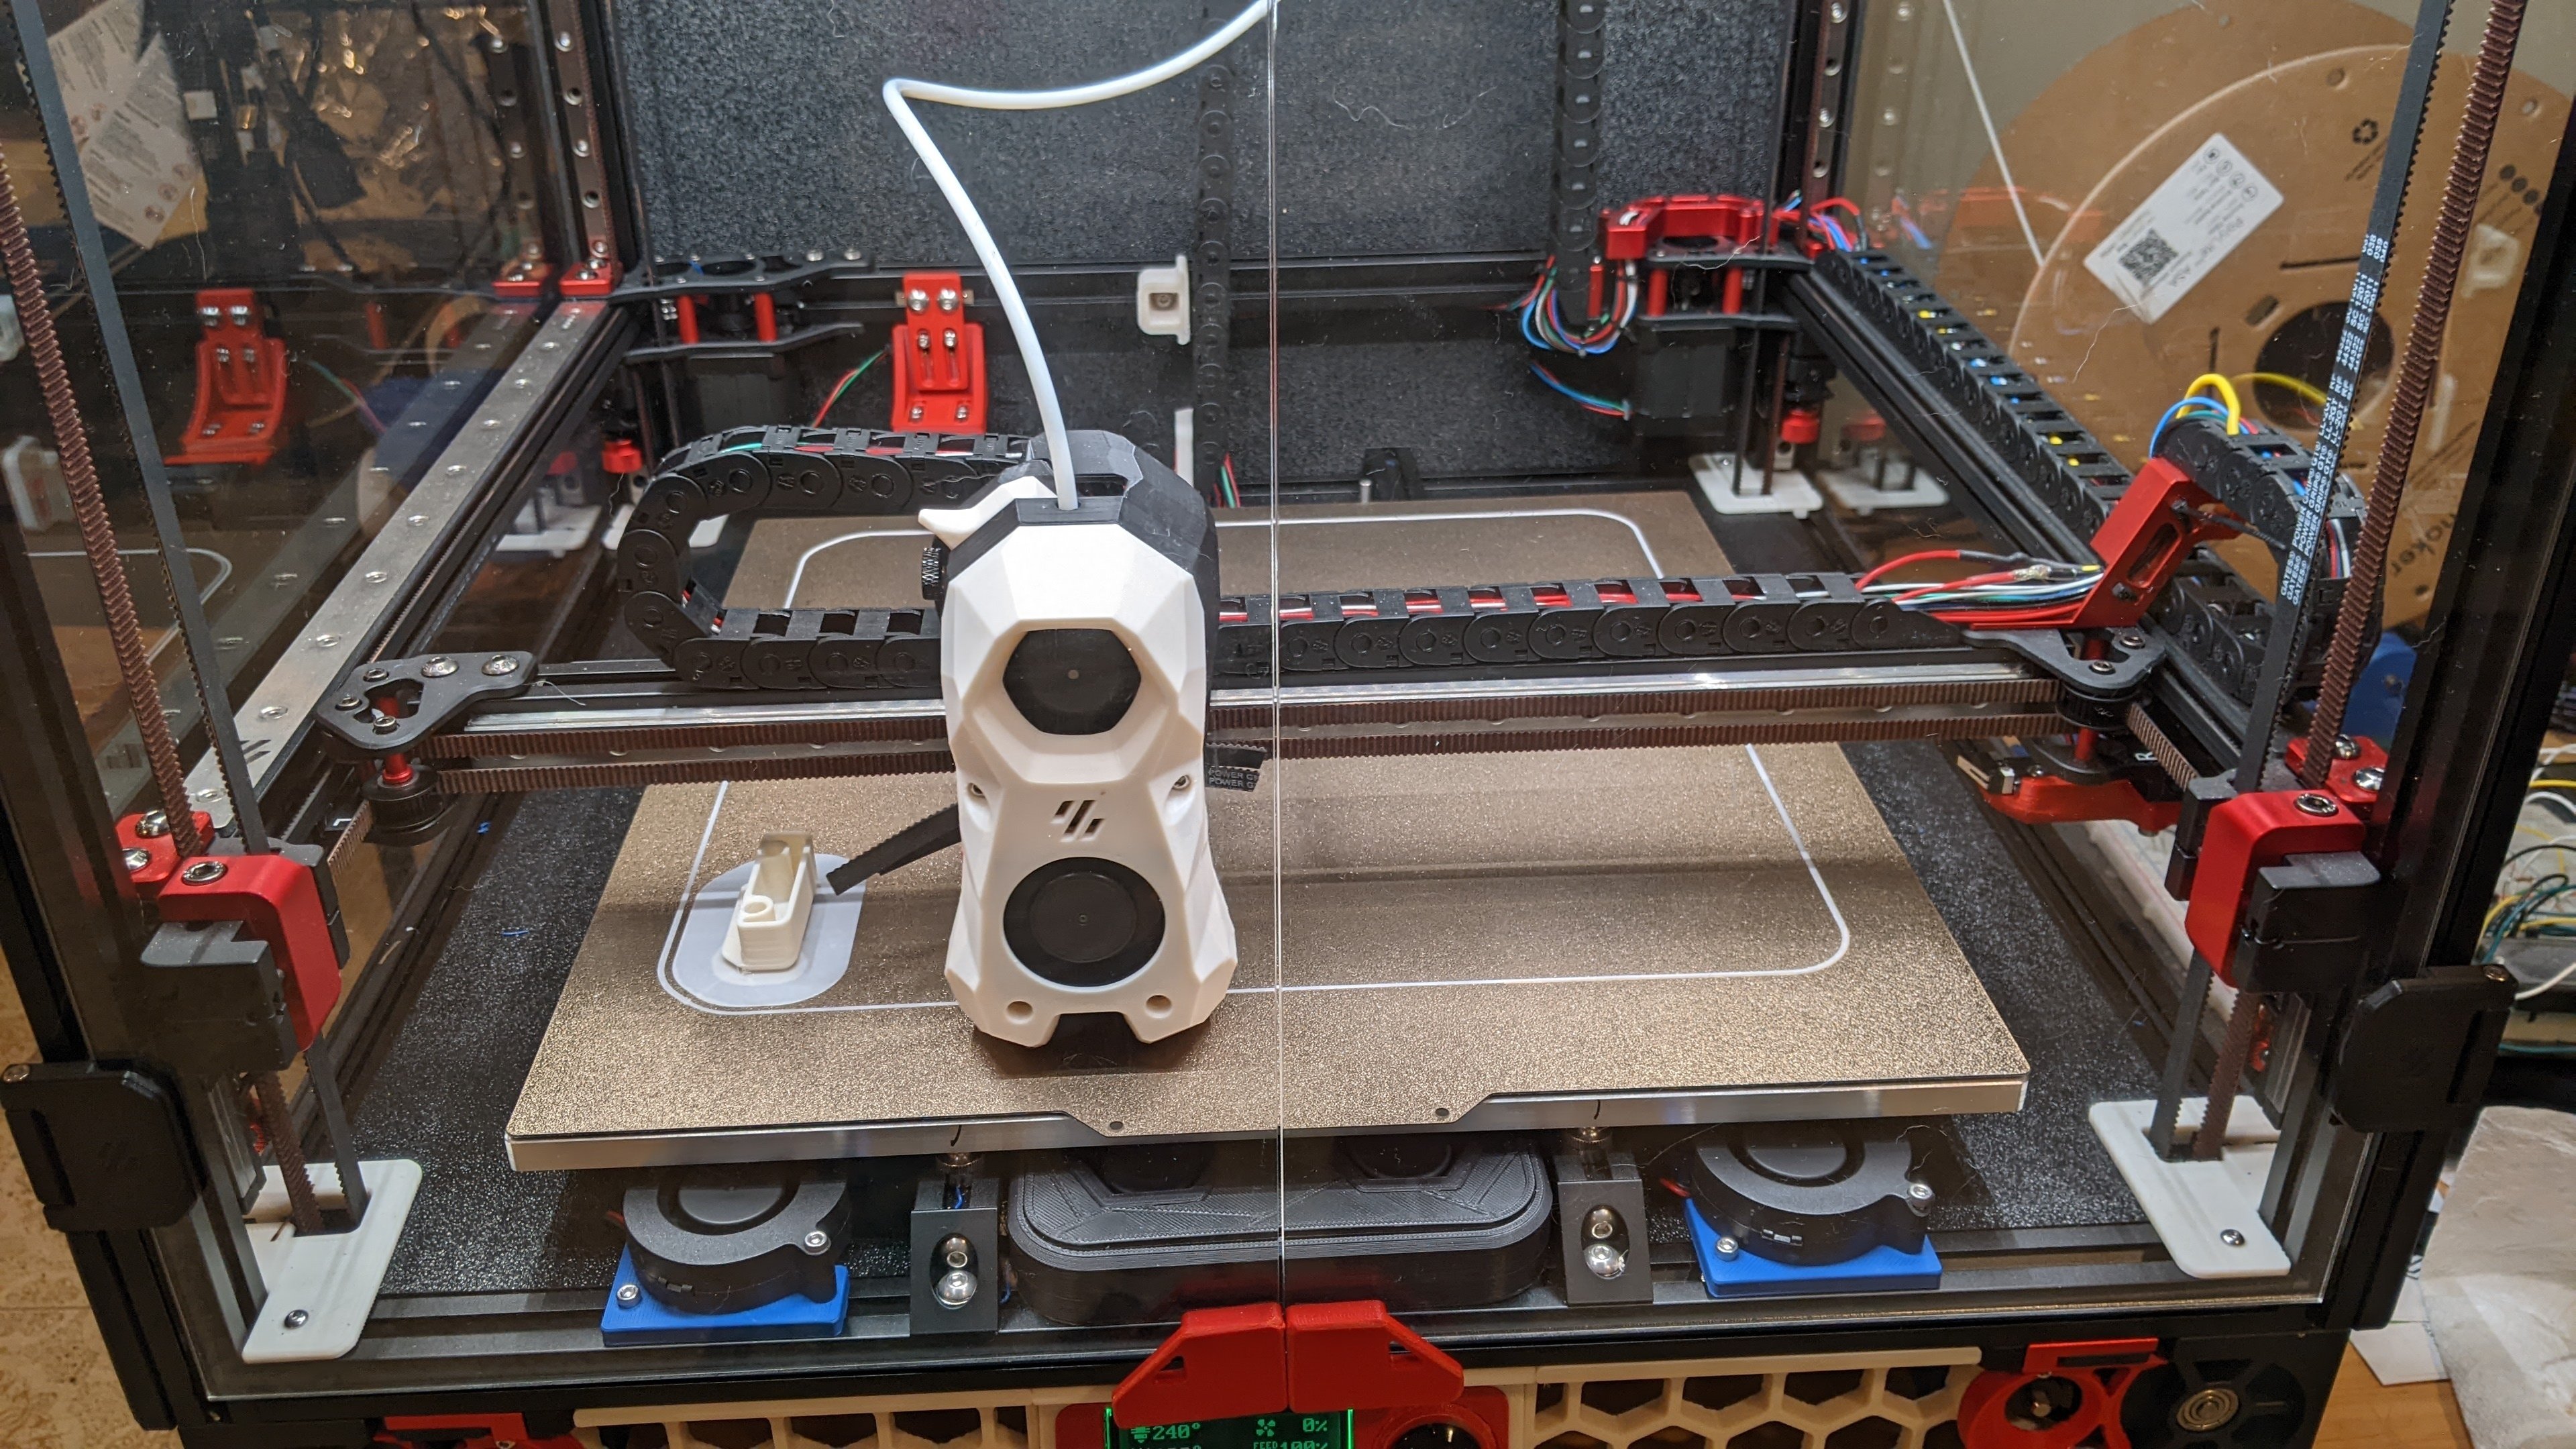
I am (slowly) working on mounting ACM panels to my Voron 2.4 to try to get my chamber temps up to reduce/eliminate warping on big ASA prints. I only needed 12 of these parts, so I chose to print them sequentially.

Want to know how slow my progress has been? Well, this photo proceeded this post and I made that post weeks ago... I'll crack open the cable chain and get this ball rolling again soon. Or maybe I'll ditch the chains and go to a USB toolhead. But that will require me to print some parts, so I guess I have to fix this. And if I'm doing that it's going to probably be 'good enough' for quite some time... 🙃

There's nothing major in the print queue, but I do want to make sure the printer is ready to go when something does turn up.


I can see the wire break in the cable chain :'(

1
submitted 4 months ago* (last edited 4 months ago) by [email protected] to c/[email protected]
 

Pros:

  • Sharp
  • Nice construction
  • Effective VR/OIS
  • Fast and accurate AF with good tracking. I've used it for a mix of birds, bugs, and youth sports. It's never failed to disappoint
  • It's not white and collapses somewhat small for a longish FF lens. I like to believe the lens didn't stand out that badly when I use it to shoot youth sports. At least I had multiple parents tell me they appreciated the photos. The hood adds a decent amount of visual mass and it's probably not needed 95% of the time
  • Decent pseudo macro, but only at the wide end (1:3.1 aka 0.32x)
  • 500mm is 25% more reach than 400mm and is enough for my needs. I'm on e-mount and this lens combo is faster than Sony's 100-400 with a teleconverter
  • Good price to performance ratio
  • The lens has a focal length lock that uses a clutch like mechanism to lock the lens at any focal length. It seems a bit gimmicky, but I find it useful
  • My copy appears fairly well centered, so yay

Cons:

  • Stiff zoom action and somewhat front heavy when fully zoomed. There's no manual focusing this lens when it's fully zoomed unless you're using a monopod or tripod
  • It's a bit heavy, but is on par for this focal length on a FF lens. If you only need 400mm, get a 400mm lens to save some heft. I use this lens exclusively hand held, but I'm also reasonably fit. I have sat on the ground and used a knee as a makeshift monopod at times though
  • Somewhat slow aperture, but this also on par for the focal length. I only use this lens outdoors, so it's never been an issue. As far as consumer lenses go, there's not much faster out there at this focal length
  • If you need a long lens you're going to need something longer than 500mm. There's obviously more reach here than a 400mm lens, but it's not that much more. This isn't a real con about this lens, just know what focal length you need and go from there
  • No teleconverters on e-mount

Bottom line:

  • If this focal length is your jam, this could be your lens
  • If you don't need the reach, get something lighter and more compact
  • If you don't mind walking around with a massive lens and you're on e-mount, Sony's 200-600 zoom action is really hard to beat


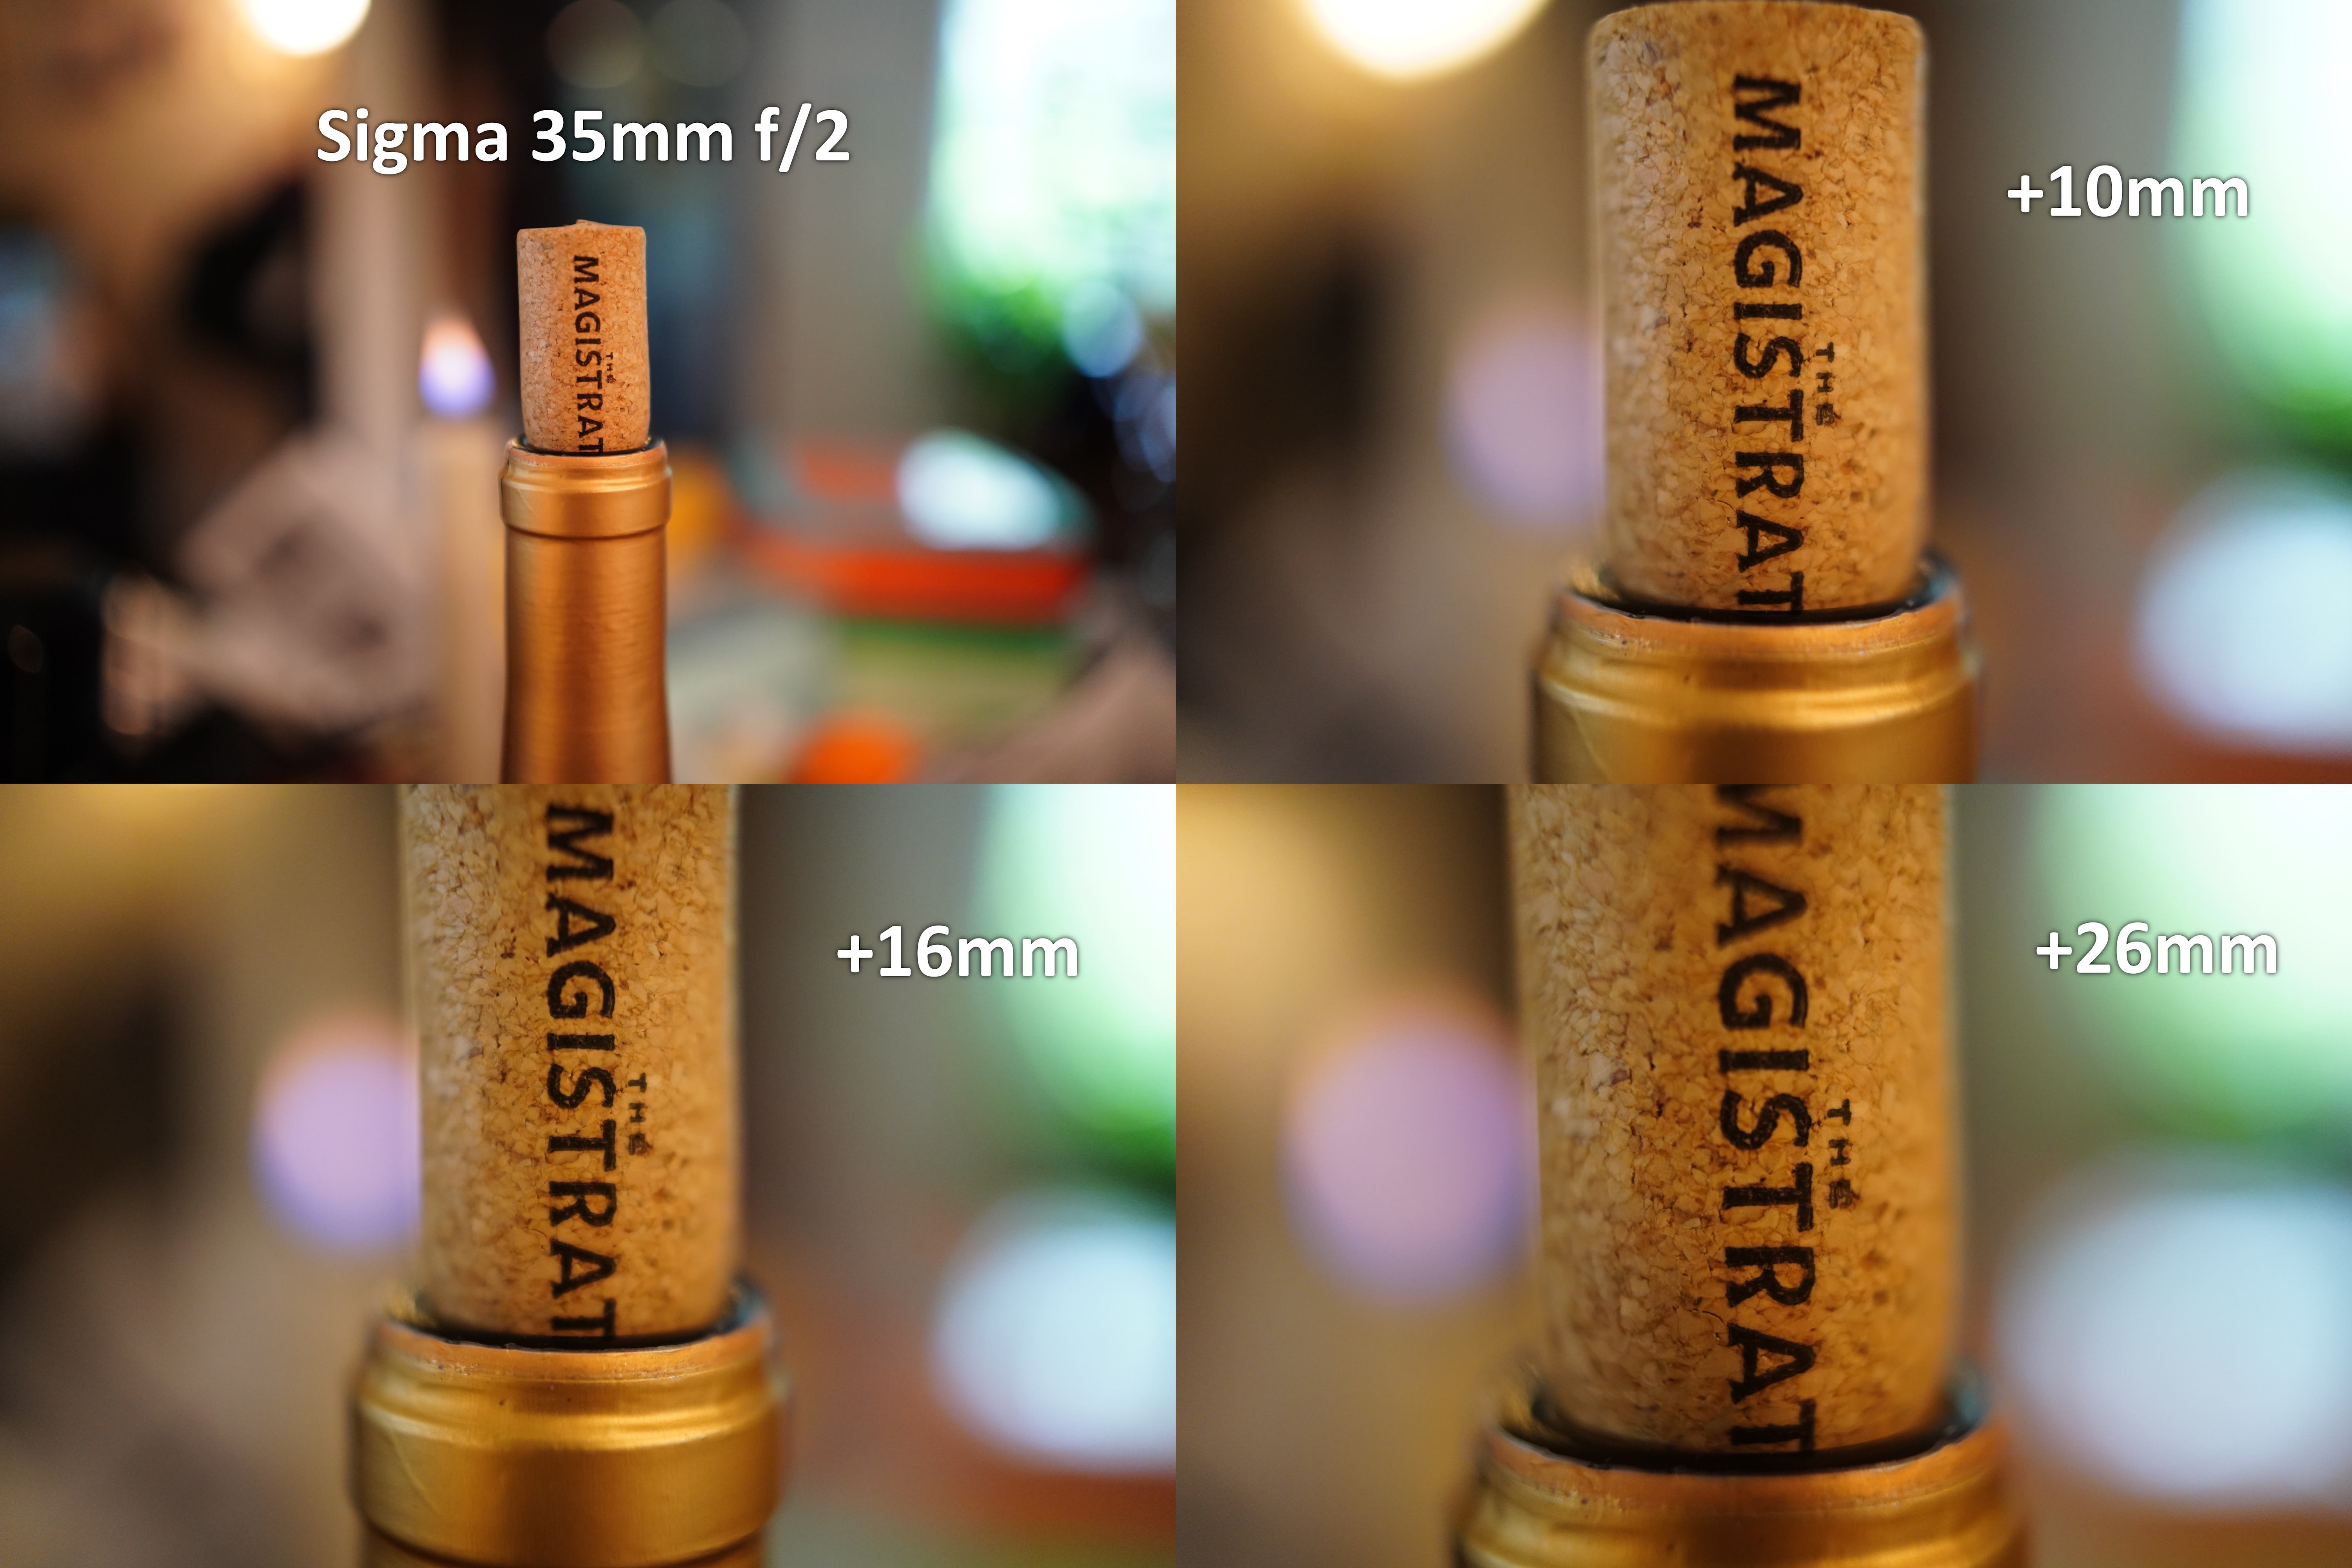
I've been interested in photographing bees recently. Rather than buy a macro lens, I spent $32 on a 10mm and 16mm Meike extension tube. Photos are with an A9II + Sigma 35mm f/2, which normally offers a 0.18x magnification. All four are taken as close as the lens will focus. I'm very happy with image quality, especially given that this lens doesn't have a super flat focal plane at its minimum focal distance.

For anyone who tries an extension tube for their first time: you won't be able to focus very far in the distance (beyond about 1 foot in my case). Be ready to get up close and personal.


No banana for scale, but let's say that it's not too big and not too small. The dimensions are 295mm tall, 270mm wide, and 240mm deep. If I had to do it again, I would be tempted to go a bit wider and touch less deep. It's probably better to be large in one of these dimensions as opposed to both of them.

Here's the top. It has a jack for charging, a connector to program the DSP, a switch to turn it on and off, and a battery gauge.

The speaker also has a built in handle that's way chunkier than it appears, but is still particle.

The big BOM pieces are a Dayton Audio LBB-5Sv2 for the BMS (battery management system), a Dayton Audio KABD-250 2 x 50W for DPS, amplification, and Bluetooth, a Peerless by Tymphany BC25SC08 tweeter, and an Italian-but-made-in-India woofer (a Coral PRF 165).

The print itself is three pieces: the bottom bit (black), the middle bit (white, blue, and white again thanks to not having enough white left to do it all in white), and the black top. Here's a CAD view that more clearly shows the three pieces:

the three pieces are held together with heat-sets and m3 bolts. There's also a tong and groove like joint to help the enclosure leak less air. I haven't noticed any evidence of air leaks while listening.

The amplifier and battery board mount to the bottom like so:

The middle was printed with some supports for the driver overhangs, but the ports and everything else were designed to print in place without supports.

This is certainly not meant to be audiophile build, but it's surprisingly decent. This isn't my first blue-tooth speaker, or even my first printed loudspeaker enclosure, but it is the first that was somewhat intentionally designed to have OK bass response while also being reasonably compact.

It measures fairly well. Frequency response, along with harmonic distortion, is pretty good. There's zero windowing or smoothing on this plot. I suspect the distortion spikes at 1 kHz, 2 kHz, etc are induced by the Bluetooth stack the board is running since they've shown up in multiple different enclosures and with multiple different drivers.

There's no nasty ringing, caused by either the drivers or the enclosure, so life is pretty good:


I'm guessing this is the result of layers of slathering a fresh layer of finish on these tables. To be honest, I kind of like the look. Any idea what type of finish this might be?

Here's a slightly different angle:

view more: next ›