Hi everyone,
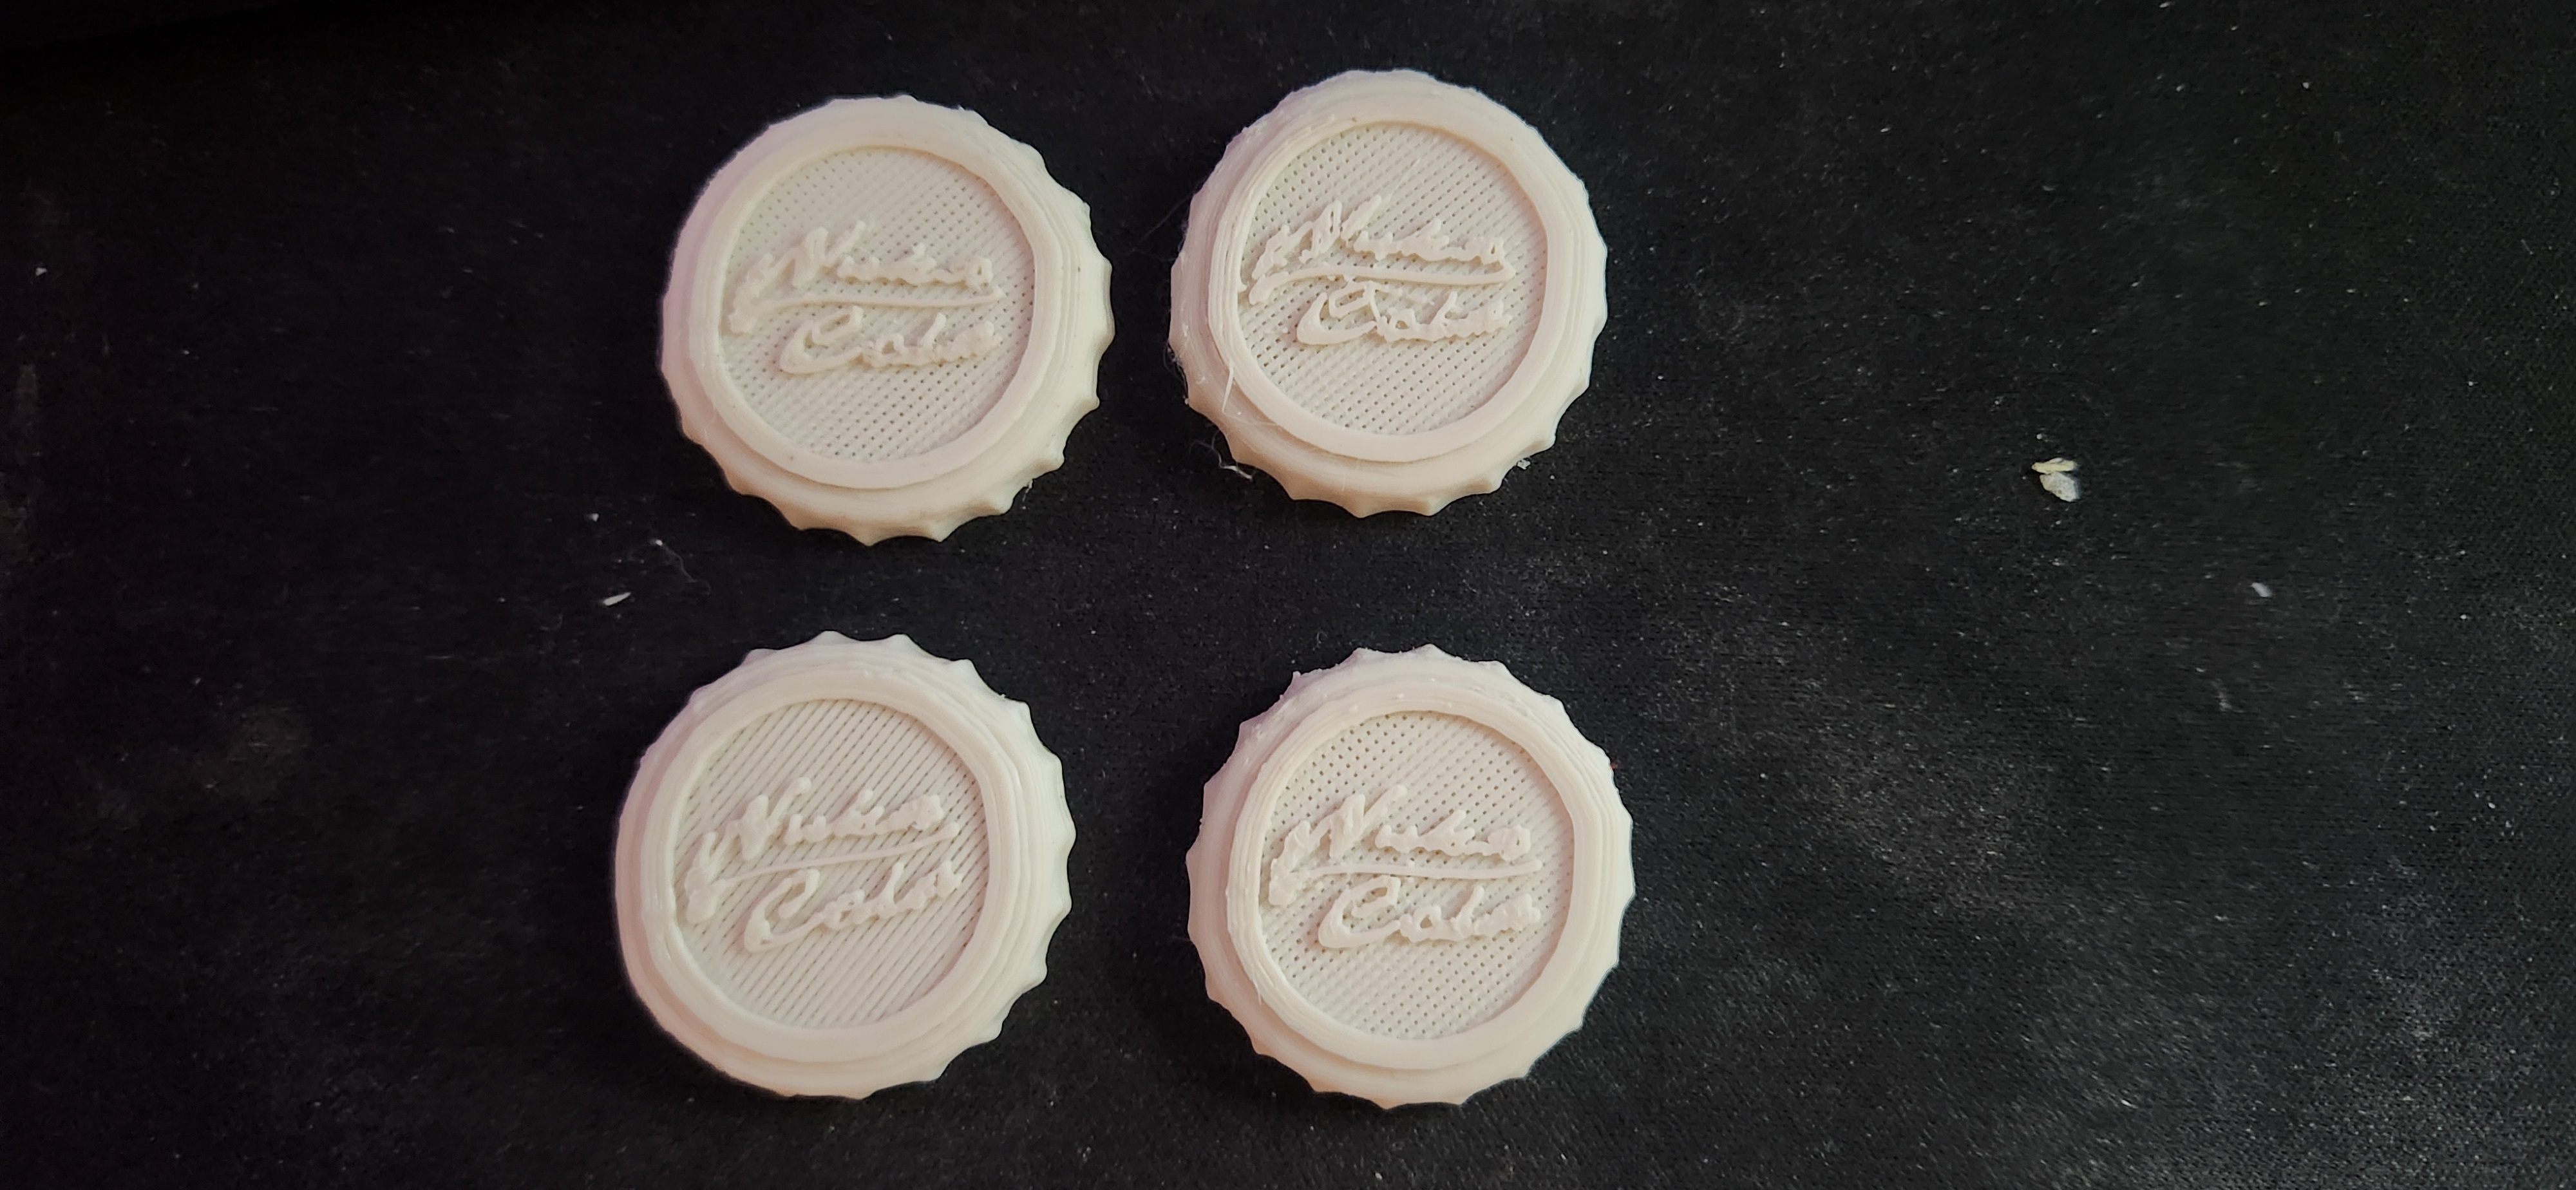
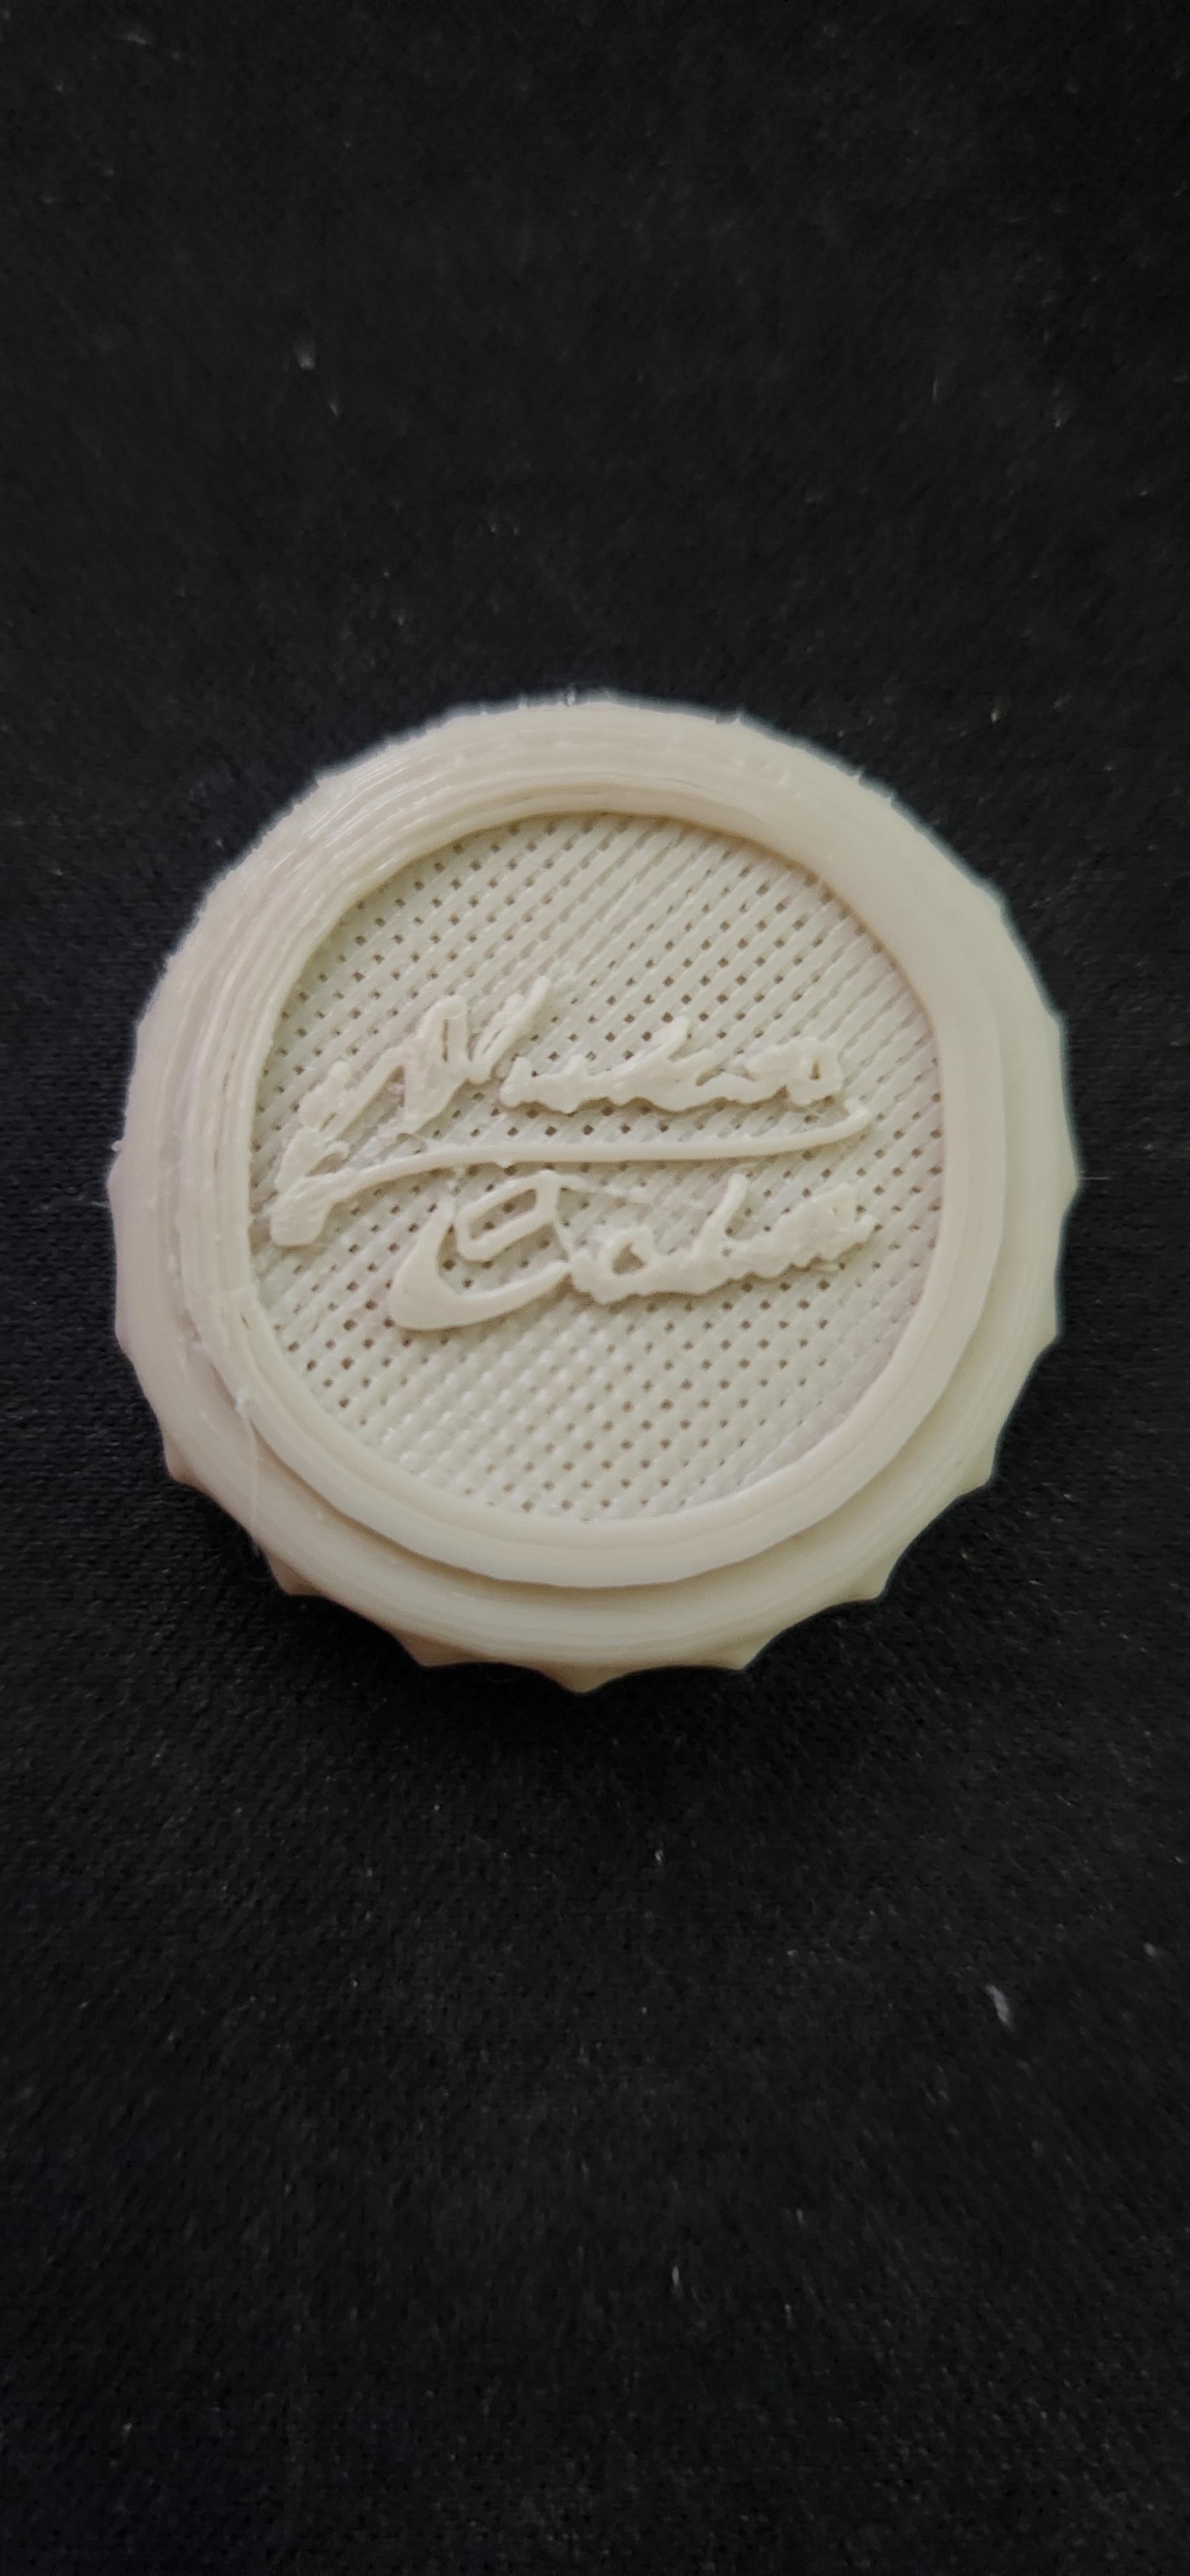
I'm having a weird issue with text such as the one in this image. Big or small, fancy or regular, all text comes out looking like it does in the image - cracked and hollow. I've spent the last few days trying to figure out why, and I'm stumped.
I've tried printing slower and slower and adding more and more top layers (the bottom 2 bottle caps are completely solid with 100% infil), but it doesn't seem to fix the issue.
Here's what I'm working with:
- Ender 3
- Software 2.0.8.27
- Hardware 4.2.2
- CR Touch
- PrusaSlicer 2.8.0
- MakerBot PLA Filament
- I've used various temperatures and speeds. All of them have generated the terrible text you see here
Thanks in advanced for the help!
Update: We seem to be getting somewhere!

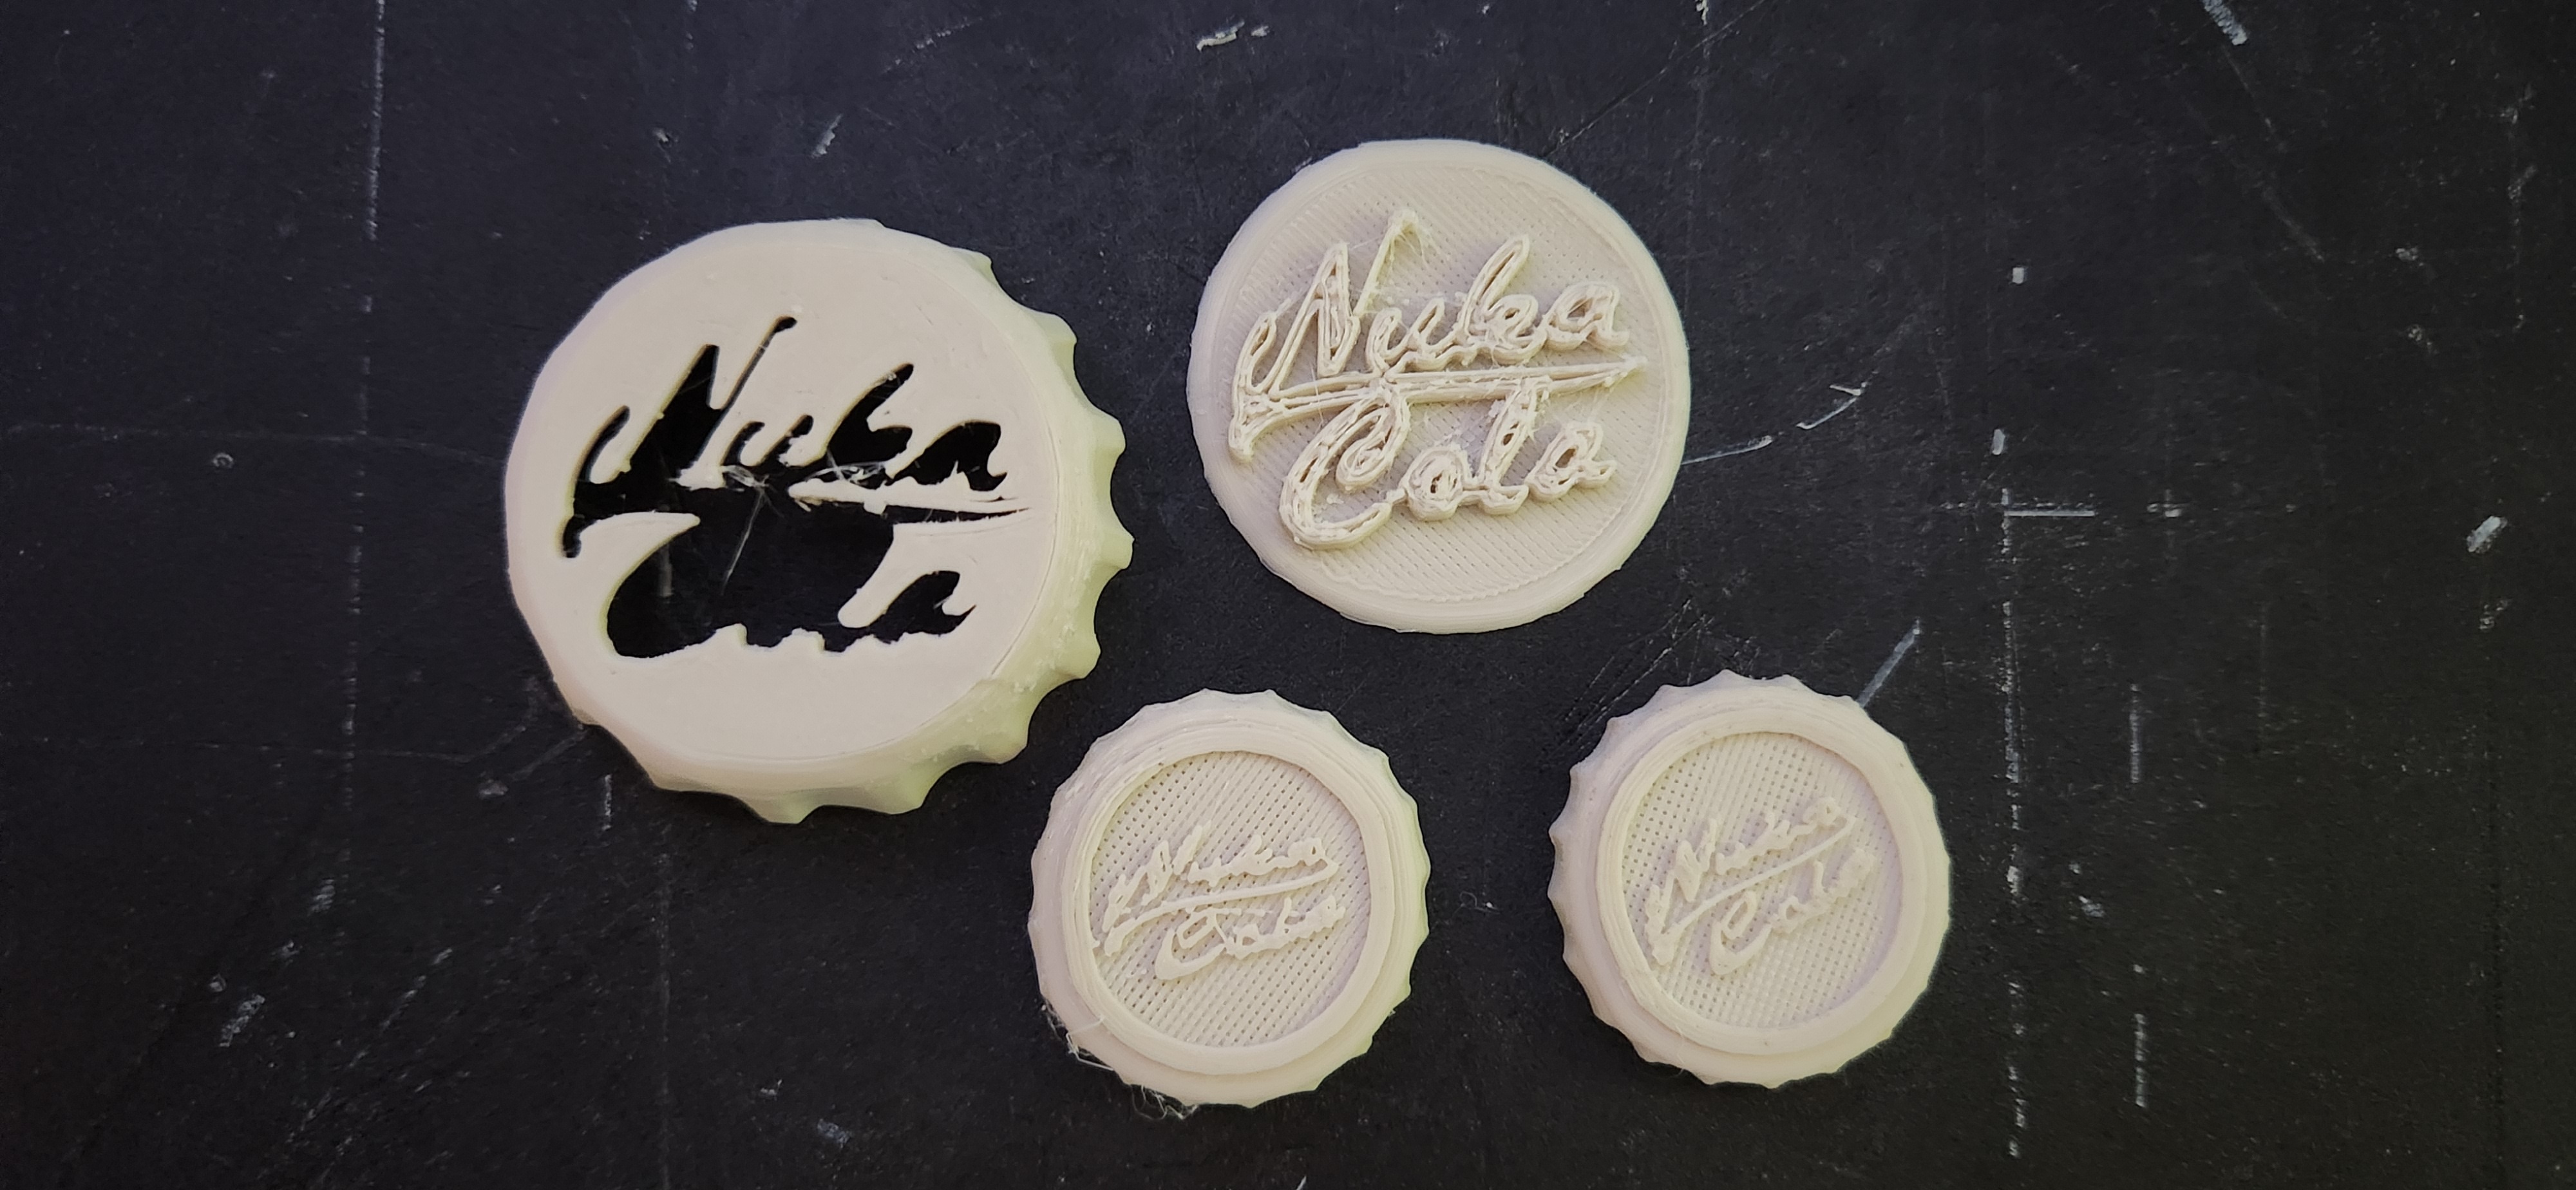
The top 2 are the same ones featured in the post above. The bottom left was printed at 110% extrusion and normal speed. The bottom right was printed at 110% extrusion and a much slower speed for the text, and it looks much better! I'm printing another now with higher bridge flow rate (it was 70%, I set it to 85%), so I'll update again in a few minutes when that finishes!
Thanks for the information about calibrating e steps from everyone! It's getting late, so I don't want to mess around with that tonight, but I'll give it a shot tomorrow!
Update 2: welp.

That's possibly the worst one yet. I'm reprinting the bigger insert piece seen in the original post to check if my printer simply can't do that quality or if it's the e steps. If it's e steps, I'm going to bed...
Update 3:
Welp, seems like it's the e-step. However, it's too late for me to care about that right now, so I'm going to bed. Thanks for the help everyone! I'll work on fixing the issue tomorrow

Thanks for the feedback!
I'm testing the bottle caps on 110% extrusion right now. Hopefully that'll solve the issue, cause I have no idea how to go about following that guide on my ender 3. It just says "use the web interface", which my cheap af ender 3 doesn't have
I personally like https://teachingtechyt.github.io/calibration.html for all of the above. It provides gcode and stl files based on your input. I've had great success using it for my Ender 3.
To do the e-step process on your ender 3, you would need to open your favorite notepad application, copy/paste the g-code on that site, save the text file as .gcode, and get that g-code to your ender 3 (SD card, etc).
The same is true for the extrusion multiplier test - you would set the test up in your slicer, slice it, and then print. Some slicers, like orca slicer and super slicer, have a built in extrusion multiplier test that makes it very easy to do this.
Ignore all the stuff that says Klipper. Install the program called pronterface and then hook up your printer to your computer with USB. You can then run the commands the guide tells you.
You should really figure out how to calibrate the esteps if you never have before, it'll save you a headache. This tutorial is a good visual: https://youtu.be/6PL_rSPZ3M8
Just adding to your comment that if OP goes that route, he will need to cover 5v pin with some electrical tape on usb otherwise he will wreck is printer board. (Unless recent ender 3 have this issue fixed but I doubt)
I've never heard of that issue before. I have a 2020 year Ender 3 and we have a half dozen at work also around the same age and have run all of them through USB with no problem
If you make a search "ender 3 5v pin", you will find plenty of examples on Reddit, octoprint forum and others. Problem was (or is) that printer was still getting power when OFF, it could lead to plenty of issues with worst case scenario where the mainboard died.
I gotcha. Sounds like as long as you connect USB only when the printer is powered on then you shouldn't have issues