maltfield

joined 1 year ago
[–] [email protected] 0 points 1 month ago* (last edited 1 month ago) (3 children)

Yeah, it's dangerous for a community to tolerate and adopt closed-source software. We should have done a better job pressuring them to license it openly.

The OSM wiki pointed me to Maperitive first, but I wish it pointed me to qgis first. We should probably edit the wiki with a huge warning banner that the code is closed, the app is full of bugs, and that it is not (and can not be) updated.

Edit: I took my own advice and added a big red box to the top of the article warning the user and pointing them to QGIS instead.

Edit 2: Do we have any way to know when the latest version of Maperitive (v2.4.3) was released? Usually I'd check the git repo, but..

Edit 3: stat on the Maperitive-latest.zip file says that it's last modified 2018-02-27 17:25:07, so it's at least 6 years old.


Make Vector Topographic Maps (Open Street Map, Maperitive, and Inkscape)

by Michael Altfield

This guide will show you how to generate vector-based topopgraphic maps, for printing very large & high-quality paper wall maps using inkscape. All of the tools used in this guide are free (as in beer).

How-to Guide to Making Vector Topo Maps with Maperitive and Inkscape

Intro

I recently volunteered at a Biological Research Station located on the eastern slopes of the Andes mountains. If the skies were clear (which is almost never, as it's a cloud forest), you would have a great view overlooking the Amazon Rainforest below.

Photo of a lush green, mountainous forest. In the background is a glacial-covered summit.
Yanayacu is in a cloud forest on the east slopes of the Andes mountains, just 30 km from the summit of the glacial-capped Antisana volcano (source)

The field station was many years old with some permanent structures and a network of established trails that meandered towards the border of Antisana National Park -- a protected area rich with biodiversity that attracts biologists from around the world. At the top of the park is a glacial-capped volcano with a summit at 5,753 meters.

Surprisingly, though Estacion Biologicia Yanayacu was over 30 years old, nobody ever prepared a proper map of their trails. And certainly there was no high-resolution topographical map of the area to be found at the Station.

That was my task: to generate maps that we could bring to a local print shop to print-out huge 1-3 meter topographical maps.

And if you want to print massive posters that don't look terrible, you're going to be working with vector graphics. However, most of the tools that I found for browsing Open Street Map data that included contour lines couldn't export an SVG. And the tools I found that could export an SVG, couldn't export contour lines.

It took me several days to figure out how to render a topographical map and export it as an SVG. This article will explain how, so you can produce a vector-based topographical map in about half a day of work.

Assumptions

This guide was written in 2024, and it uses the following software and versions:

  1. Debian 12 (bookworm)
  2. OsmAnd~ v4.7.10
  3. JOSM v18646
  4. Maperitive v2.4.3
  5. Inkscape v1.2.2

The Tools

Unfortunately, there's no all-in-one app that will let you just load a slippy map, zoom-in, draw a box, and hit "export as SVG". We'll be using a few different tools to meet our needs.

OsmAnd
OsmAnd

OsmAnd

OsmAnd is a mobile app.

We'll be using OsmAnd to walk around on the trails and generate GPX files (which contain a set of GPS coordinates and some metadata). We'll use these coordinates to generate vector lines of a trail overlaying the topographic map.

If you just want a topographic map without trails (or your trails are already marked on OSM data), then you won't need this tool.

In this guide we'll be using OsmAnd, but you an also use other apps -- such as Organic Maps, Maps.me, or Gaia.

JOSM
JOSM

JOSM

JOSM is a java-based tool for editing Open Street Map data.

We'll be using JOSM to upload the paths of our trails (recorded GPX files from OsmAnd) and also to download additional data (rivers, national park boundary line, road to the trailhead, etc). We'll then be able to combine all of this data into a larger GPX file, which will eventually become vector lines overlaying the topographic map.

You can skip this if you just want contour lines without things like rivers, roads, trails, buildings, and park borders.

View Finder Panoramas

Have you ever wondered how you can zoom-in almost anywhere in the world and see contour lines? I always thought that this was the result of some herculean effort of surveyors scaling mountains and descending canyons the world-over. But, no -- it's a product of the US Space Shuttle program.

In the year 2000, an international program called SRTM (Shuttle Radar Topography Mission) was launched into space with the Endaevor Space Shuttle. It consisted of a special radar system tethered to the shuttle with a 60 meter mast as it orbited the earth.

Artist rendering shows a space shuttle with a purple beam emanating from it to a blue, cloudy sphere below. Attached to the shuttle is a long mast with a device at the end of it, where another purple beam emanates down to the same point on Earth, at a different angle.
This illustration shows the Space Shuttle Endeavour orbiting ~233 kilometers above Earth. The two anternae, one located in the Shuttle bay and the other located on a 60-meter mast, were able to penetrate clouds, obtaining 3-dimentional topographic images of the world's surface (source: NASA)

When the shuttle returned to earth, the majority of our planet's contours were mapped. This data was placed on the public domain. Today, it is the main data source for elevation data in most maps.

While the data from SRTM was a huge boon to cartographers, it did have some gaps. Namely: elevation data was missing in very tall mountains and very low canyons. Subsequent work was done to fill-in these gaps. One particular source that ingested the SRTM data, completed its gaps, and made the results public is Jonathan de Ferranti's viewfinderpanoramas.org.

We will be downloading .hgt files from View Finder Panoramas in order to generate vector contour lines for our topographical map.

Maperitive
Maperitive

Maperitive

Maperitive is a closed-source .NET-based mapping software (which runs fine in Linux with mono).

We'll be using Maperitive to tie together our GPX tracks, generate contour lines, generate hillshades, and export it all as a SVG.

Inkscape
Inkscape

Inkscape

Inkscape is a cross-platform app for artists working with vector graphics.

We'll be using inkscape to make some final touches to our vector image, such as hiding some paths, changing their stroke color/shape/thickness, and adding/moving text labels. Finally, we'll use inkscape to export a gigantic, high-definition .png raster image (to send to the print shop).

Guide

To read the full guide on how to create vector-based maps, click here:

Example Maps

For example, here's the (A4-sized) topo map that I built for Yanayacu.

Image shows a topographical map of a mountainous area. The title reads \"Yanayacu\". The elevation ranges from 2,100 to 2,900. The bottom-left has a small font that reads \"Map by Michael Altfield / github.com/maltfield/yanayacu\"
Final (raster) export, ready for sending to the print shop (source svg)

Note that I changed the stroke and thickness of the National Park boundary to be large and green, I changed the path of the road (downloaded from OSM data in JOSM) to be thick and black, and I changed my GPX tracks (recorded in OsmAnd and merged with the OSM data in JOSM) to be thin, dashed, and red.

The source .svg file for the above image can be found here

I also used this method to generate a simplified "trail map" of Yanayacu (without contour lines). The workflow was similar, except I didn't generate contour nor hillshades layers in Maperitive before exporting as a .svg
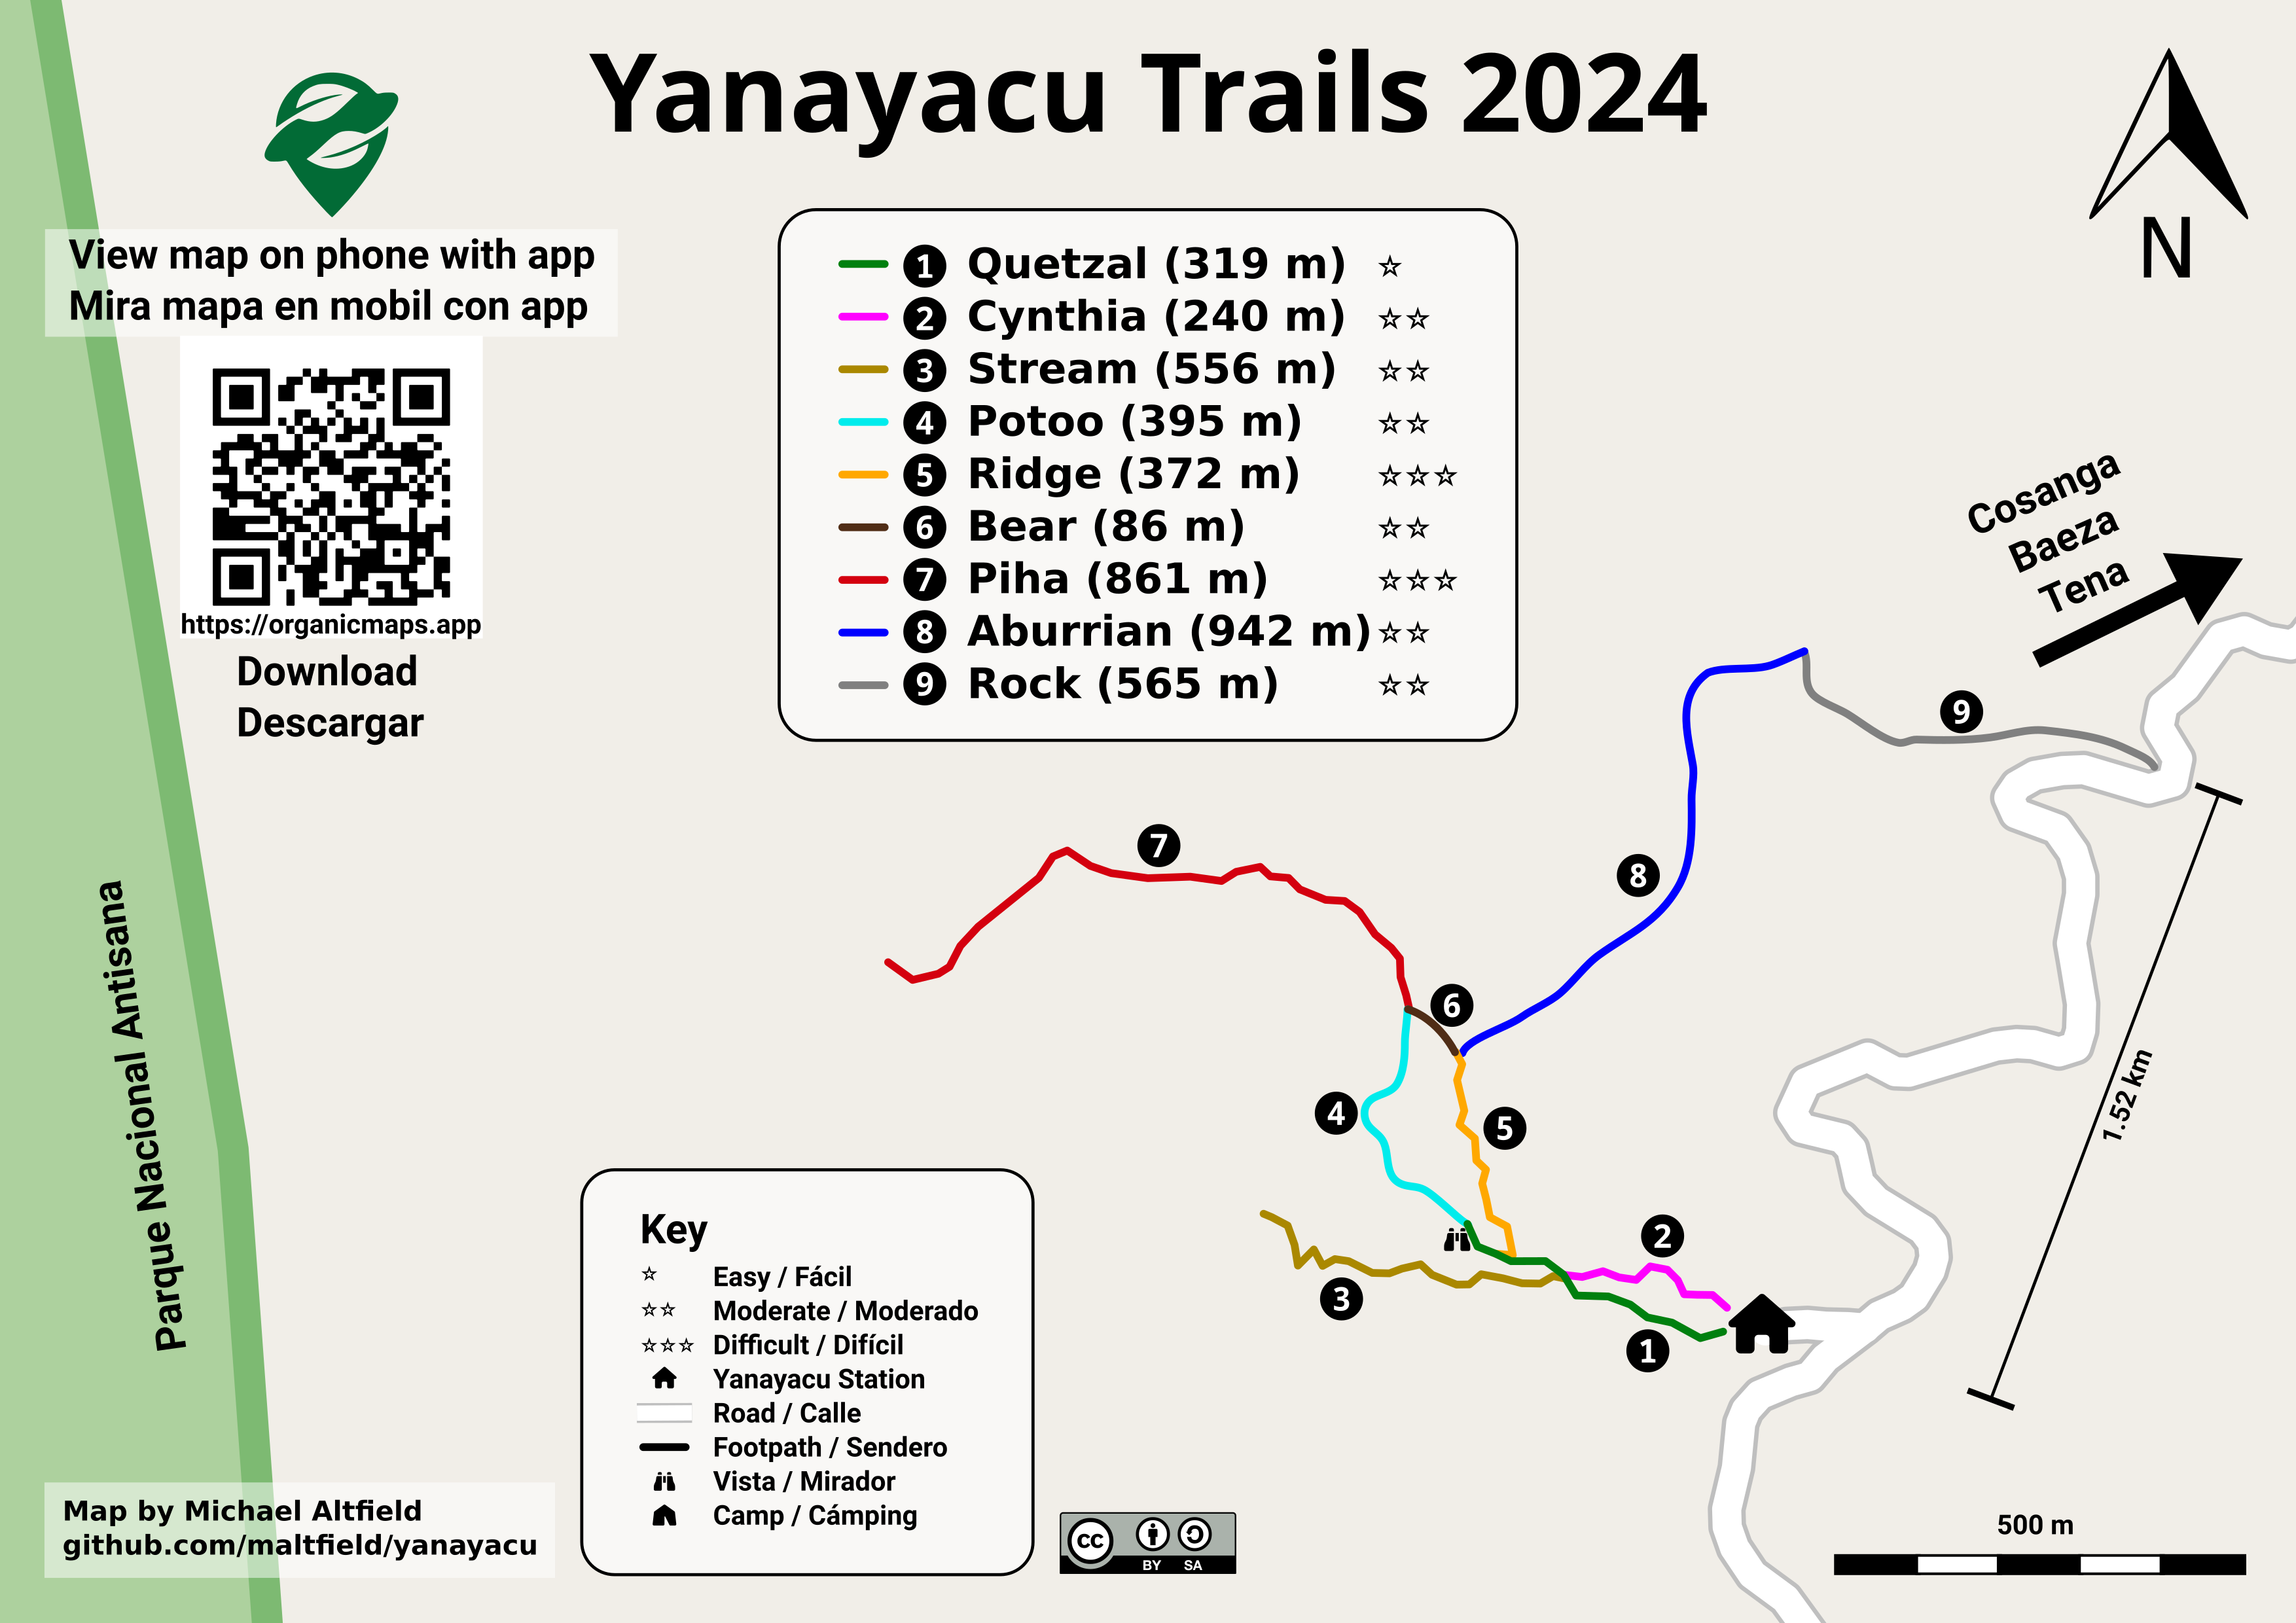
Image shows a \"trail guide\" map. The title reads \"Yanayacu Trails 2024\". The bottom-left has a small font that reads \"Map by Michael Altfield / github.com/maltfield/yanayacu\")
Yanayacu Trail Guide (source svg)

The source .svg file for the above image can be found here
 

Make Vector Topographic Maps (Open Street Map, Maperitive, and Inkscape)

by Michael Altfield

This guide will show you how to generate vector-based topopgraphic maps, for printing very large & high-quality paper wall maps using inkscape. All of the tools used in this guide are free (as in beer).

How-to Guide to Making Vector Topo Maps with Maperitive and Inkscape

Intro

I recently volunteered at a Biological Research Station located on the eastern slopes of the Andes mountains. If the skies were clear (which is almost never, as it's a cloud forest), you would have a great view overlooking the Amazon Rainforest below.

Photo of a lush green, mountainous forest. In the background is a glacial-covered summit.
Yanayacu is in a cloud forest on the east slopes of the Andes mountains, just 30 km from the summit of the glacial-capped Antisana volcano (source)

The field station was many years old with some permanent structures and a network of established trails that meandered towards the border of Antisana National Park -- a protected area rich with biodiversity that attracts biologists from around the world. At the top of the park is a glacial-capped volcano with a summit at 5,753 meters.

Surprisingly, though Estacion Biologicia Yanayacu was over 30 years old, nobody ever prepared a proper map of their trails. And certainly there was no high-resolution topographical map of the area to be found at the Station.

That was my task: to generate maps that we could bring to a local print shop to print-out huge 1-3 meter topographical maps.

And if you want to print massive posters that don't look terrible, you're going to be working with vector graphics. However, most of the tools that I found for browsing Open Street Map data that included contour lines couldn't export an SVG. And the tools I found that could export an SVG, couldn't export contour lines.

It took me several days to figure out how to render a topographical map and export it as an SVG. This article will explain how, so you can produce a vector-based topographical map in about half a day of work.

Assumptions

This guide was written in 2024, and it uses the following software and versions:

  1. Debian 12 (bookworm)
  2. OsmAnd~ v4.7.10
  3. JOSM v18646
  4. Maperitive v2.4.3
  5. Inkscape v1.2.2

The Tools

Unfortunately, there's no all-in-one app that will let you just load a slippy map, zoom-in, draw a box, and hit "export as SVG". We'll be using a few different tools to meet our needs.

OsmAnd
OsmAnd

OsmAnd

OsmAnd is a mobile app.

We'll be using OsmAnd to walk around on the trails and generate GPX files (which contain a set of GPS coordinates and some metadata). We'll use these coordinates to generate vector lines of a trail overlaying the topographic map.

If you just want a topographic map without trails (or your trails are already marked on OSM data), then you won't need this tool.

In this guide we'll be using OsmAnd, but you an also use other apps -- such as Organic Maps, Maps.me, or Gaia.

JOSM
JOSM

JOSM

JOSM is a java-based tool for editing Open Street Map data.

We'll be using JOSM to upload the paths of our trails (recorded GPX files from OsmAnd) and also to download additional data (rivers, national park boundary line, road to the trailhead, etc). We'll then be able to combine all of this data into a larger GPX file, which will eventually become vector lines overlaying the topographic map.

You can skip this if you just want contour lines without things like rivers, roads, trails, buildings, and park borders.

View Finder Panoramas

Have you ever wondered how you can zoom-in almost anywhere in the world and see contour lines? I always thought that this was the result of some herculean effort of surveyors scaling mountains and descending canyons the world-over. But, no -- it's a product of the US Space Shuttle program.

In the year 2000, an international program called SRTM (Shuttle Radar Topography Mission) was launched into space with the Endaevor Space Shuttle. It consisted of a special radar system tethered to the shuttle with a 60 meter mast as it orbited the earth.

Artist rendering shows a space shuttle with a purple beam emanating from it to a blue, cloudy sphere below. Attached to the shuttle is a long mast with a device at the end of it, where another purple beam emanates down to the same point on Earth, at a different angle.
This illustration shows the Space Shuttle Endeavour orbiting ~233 kilometers above Earth. The two anternae, one located in the Shuttle bay and the other located on a 60-meter mast, were able to penetrate clouds, obtaining 3-dimentional topographic images of the world's surface (source: NASA)

When the shuttle returned to earth, the majority of our planet's contours were mapped. This data was placed on the public domain. Today, it is the main data source for elevation data in most maps.

While the data from SRTM was a huge boon to cartographers, it did have some gaps. Namely: elevation data was missing in very tall mountains and very low canyons. Subsequent work was done to fill-in these gaps. One particular source that ingested the SRTM data, completed its gaps, and made the results public is Jonathan de Ferranti's viewfinderpanoramas.org.

We will be downloading .hgt files from View Finder Panoramas in order to generate vector contour lines for our topographical map.

Maperitive
Maperitive

Maperitive

Maperitive is a closed-source .NET-based mapping software (which runs fine in Linux with mono).

We'll be using Maperitive to tie together our GPX tracks, generate contour lines, generate hillshades, and export it all as a SVG.

Inkscape
Inkscape

Inkscape

Inkscape is a cross-platform app for artists working with vector graphics.

We'll be using inkscape to make some final touches to our vector image, such as hiding some paths, changing their stroke color/shape/thickness, and adding/moving text labels. Finally, we'll use inkscape to export a gigantic, high-definition .png raster image (to send to the print shop).

Guide

To read the full guide on how to create vector-based maps, click here:

Example Maps

For example, here's the (A4-sized) topo map that I built for Yanayacu.

Image shows a topographical map of a mountainous area. The title reads \"Yanayacu\". The elevation ranges from 2,100 to 2,900. The bottom-left has a small font that reads \"Map by Michael Altfield / github.com/maltfield/yanayacu\"
Final (raster) export, ready for sending to the print shop (source svg)

Note that I changed the stroke and thickness of the National Park boundary to be large and green, I changed the path of the road (downloaded from OSM data in JOSM) to be thick and black, and I changed my GPX tracks (recorded in OsmAnd and merged with the OSM data in JOSM) to be thin, dashed, and red.

The source .svg file for the above image can be found here
I also used this method to generate a simplified "trail map" of Yanayacu (without contour lines). The workflow was similar, except I didn't generate contour nor hillshades layers in Maperitive before exporting as a .svg

Image shows a \"trail guide\" map. The title reads \"Yanayacu Trails 2024\". The bottom-left has a small font that reads \"Map by Michael Altfield / github.com/maltfield/yanayacu\")
Yanayacu Trail Guide (source svg)

The source .svg file for the above image can be found here
 

This article will describe how to download an image from a (docker) container registry.

Manual Download of Container Images with wget and curl

Intro

Remember the good `'ol days when you could just download software by visiting a website and click "download"?

Even apt and yum repositories were just simple HTTP servers that you could just curl (or wget) from. Using the package manager was, of course, more secure and convenient -- but you could always just download packages manually, if you wanted.

But have you ever tried to curl an image from a container registry, such as docker? Well friends, I have tried. And I have the scars to prove it.

It was a remarkably complex process that took me weeks to figure-out. Lucky you, this article will break it down.

Examples

Specifically, we'll look at how to download files from two OCI registries.

  1. Docker Hub
  2. GitHub Packages

Terms

First, here's some terminology used by OCI

  1. OCI - Open Container Initiative
  2. blob - A "blob" in the OCI spec just means a file
  3. manifest - A "manifest" in the OCI spec means a list of files

Prerequisites

This guide was written in 2024, and it uses the following software and versions:

  1. debian 12 (bookworm)
  2. curl 7.88.1
  3. OCI Distribution Spec v1.1.0 (which, unintuitively, uses the '/v2/' endpoint)

Of course, you'll need 'curl' installed. And, to parse json, 'jq' too.

sudo apt-get install curl jq

What is OCI?

OCI stands for Open Container Initiative.

OCI was originally formed in June 2015 for Docker and CoreOS. Today it's a wider, general-purpose (and annoyingly complex) way that many projects host files (that are extremely non-trivial to download).

One does not simply download a file from an OCI-complianet container registry. You must:

  1. Generate an authentication token for the API
  2. Make an API call to the registry, requesting to download a JSON "Manifest"
  3. Parse the JSON Manifest to figure out the hash of the file that you want
  4. Determine the download URL from the hash
  5. Download the file (which might actually be many distinct file "layers")
One does not simply download from a container registry

In order to figure out how to make an API call to the registry, you must first read (and understand) the OCI specs here.

OCI APIs

OCI maintains three distinct specifications:

  1. image spec
  2. runtime spec
  3. distribution spec

OCI "Distribution Spec" API

To figure out how to download a file from a container registry, we're interested in the "distribution spec". At the time of writing, the latest "distribution spec" can be downloaded here:

The above PDF file defines a set of API endpoints that we can use to query, parse, and then figure out how to download a file from a container registry. The table from the above PDF is copied below:

ID Method API Endpoint Success Failure
end-1 GET /v2/ 200 404/401
end-2 GET / HEAD /v2/<name>/blobs/<digest> 200 404
end-3 GET / HEAD /v2/<name>/manifests/<reference> 200 404
end-4a POST /v2/<name>/blobs/uploads/ 202 404
end-4b POST /v2/<name>/blobs/uploads/?digest=<digest> 201/202 404/400
end-5 PATCH /v2/<name>/blobs/uploads/<reference> 202 404/416
end-6 PUT /v2/<name>/blobs/uploads/<reference>?digest=<digest> 201 404/400
end-7 PUT /v2/<name>/manifests/<reference> 201 404
end-8a GET /v2/<name>/tags/list 200 404
end-8b GET /v2/<name>/tags/list?n=<integer>&last=<integer> 200 404
end-9 DELETE /v2/<name>/manifests/<reference> 202 404/400/405
end-10 DELETE /v2/<name>/blobs/<digest> 202 404/405
end-11 POST /v2/<name>/blobs/uploads/?mount=<digest>&from=<other_name> 201 404
end-12a GET /v2/<name>/referrers/<digest> 200 404/400
end-12b GET /v2/<name>/referrers/<digest>?artifactType=<artifactType> 200 404/400
end-13 GET /v2/<name>/blobs/uploads/<reference> 204 404

In OCI, files are (cryptically) called "blobs". In order to figure out the file that we want to download, we must first reference the list of files (called a "manifest").

The above table shows us how we can download a list of files (manifest) and then download the actual file (blob).

Examples

Let's look at how to download files from a couple different OCI registries:

  1. Docker Hub
  2. GitHub Packages

Docker Hub

To see the full example of downloading images from docker hub, click here

GitHub Packages

To see the full example of downloading files from GitHub Packages, click here.

Why?

I wrote this article because many, many folks have inquired about how to manually download files from OCI registries on the Internet, but their simple queries are usually returned with a barrage of useless counter-questions: why the heck would you want to do that!?!

The answer is varied.

Some people need to get files onto a restricted environment. Either their org doesn't grant them permission to install software on the machine, or the system has firewall-restricted internet access -- or doesn't have internet access at all.

3TOFU

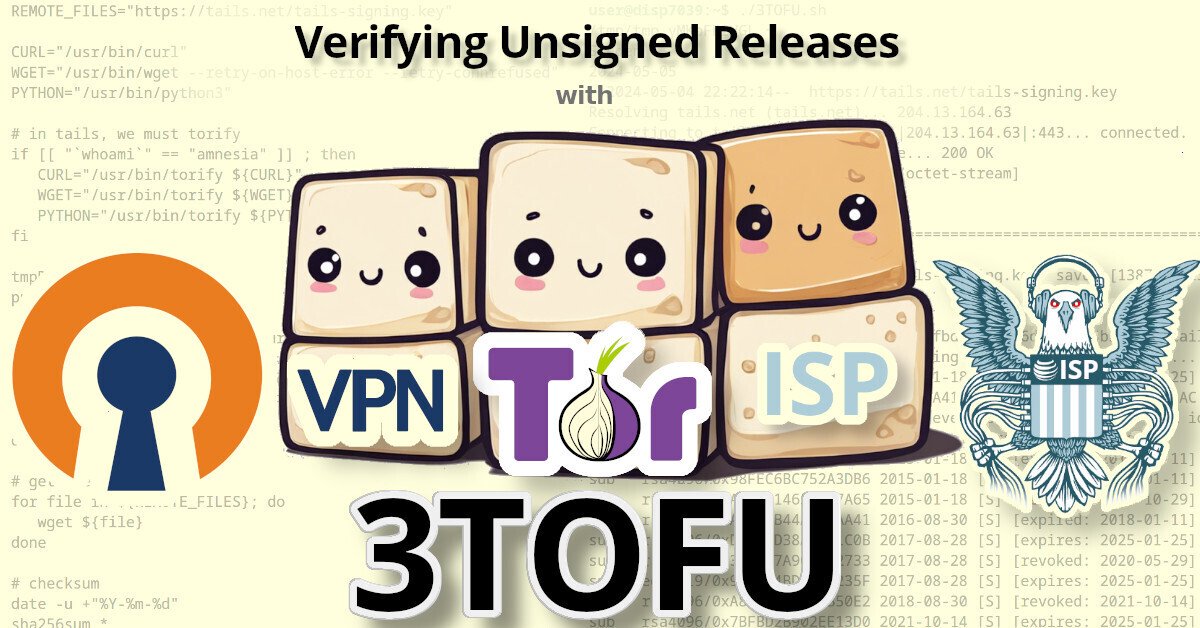
Personally, the reason that I wanted to be able to download files from an OCI registry was for 3TOFU.

Verifying Unsigned Releases with 3TOFU

Unfortunaetly, most apps using OCI registries are extremely insecure. Docker, for example, will happily download malicious images. By default, it doesn't do any authenticity verifications on the payloads it downloaded. Even if you manually enable DCT, there's loads of pending issues with it.

Likewise, the macOS package manager brew has this same problem: it will happily download and install malicious code, because it doesn't use cryptography to verify the authenticity of anything that it downloads. This introduces watering hole vulnerabilities when developers use brew to install dependencies in their CI pipelines.

My solution to this? 3TOFU. And that requires me to be able to download the file (for verification) on three distinct linux VMs using curl or wget.

⚠ NOTE: 3TOFU is an approach to harm reduction.

It is not wise to download and run binaries or code whose authenticity you cannot verify using a cryptographic signature from a key stored offline. However, sometimes we cannot avoid it. If you're going to proceed with running untrusted code, then following a 3TOFU procedure may reduce your risk, but it's better to avoid running unauthenticated code if at all possible.

Registry (ab)use

Container registries were created in 2013 to provide a clever & complex solution to a problem: how to package and serve multiple versions of simplified sources to various consumers spanning multiple operating systems and architectures -- while also packaging them into small, discrete "layers".

However, if your project is just serving simple files, then the only thing gained by uploading them to a complex system like a container registry is headaches. Why do developers do this?

In the case of brew, their free hosing provider (JFrog's Bintray) shutdown in 2021. Brew was already hosting their code on GitHub, so I guess someone looked at "GitHub Packages" and figured it was a good (read: free) replacement.

Many developers using Container Registries don't need the complexity, but -- well -- they're just using it as a free place for their FOSS project to store some files, man.


3TOFU: Verifying Unsigned Releases

By Michael Altfield
License: CC BY-SA 4.0
https://tech.michaelaltfield.net

This article introduces the concept of "3TOFU" -- a harm-reduction process when downloading software that cannot be verified cryptographically.

Verifying Unsigned Releases with 3TOFU

⚠ NOTE: This article is about harm reduction.

It is dangerous to download and run binaries (or code) whose authenticity you cannot verify (using a cryptographic signature from a key stored offline). However, sometimes we cannot avoid it. If you're going to proceed with running untrusted code, then following the steps outlined in this guide may reduce your risk.

TOFU

TOFU stands for Trust On First Use. It's a (often abused) concept of downloading a person or org's signing key and just blindly trusting it (instead of verifying it).

3TOFU

3TOFU is a process where a user downloads something three times at three different locations. If-and-only-if all three downloads are identical, then you trust it.

Why 3TOFU?

During the Crypto Wars of the 1990s, it was illegal to export cryptography from the United States. In 1996, after intense public pressure and legal challenges, the government officially permitted export with the 56-bit DES cipher -- which was a known-vulnerable cipher.

Photo of Paul Kocher holding a very large circuit board
The EFF's Deep Crack proved DES to be insecure and pushed a switch to 3DES.

But there was a simple way to use insecure DES to make secure messages: just use it three times.

3DES (aka "Triple DES") is the process encrypting a message using the insecure symmetric block cipher (DES) three times on each block, to produce an actually secure message (from known attacks at the time).

3TOFU (aka "Triple TOFU") is the process of downloading a payload using the insecure method (TOFU) three times, to obtain the payload that's magnitudes less likely to be maliciously altered.

3TOFU Process

To best mitigate targeted attacks, 3TOFU should be done:

  1. On three distinct days
  2. On three distinct machines (or VMs)
  3. Exiting from three distinct countries
  4. Exiting using three distinct networks

For example, I'll usually execute

  • TOFU #1/3 in TAILS (via Tor)
  • TOFU #2/3 in a Debian VM (via VPN)
  • TOFU #3/3 on my daily laptop (via ISP)

The possibility of an attacker maliciously modifying something you download over your ISP's network are quite high, depending on which country you live-in.

The possibility of an attacker maliciously modifying something you download onto a VM with a freshly installed OS over an encrypted VPN connection (routed internationally and exiting from another country) is much less likely, but still possible -- especially for a well-funded adversary.

The possibility of an attacker maliciously modifying something you download onto a VM running a hardened OS (like Whonix or TAILS) using a hardened browser (like Tor Browser) over an anonymizing network (like Tor) is quite unlikely.

The possibility for someone to execute a network attack on all three downloads is very near-zero -- especially if the downloads were spread-out over days or weeks.

3TOFU bash Script

I provide the following bash script as an example snippet that I run for each of the 3TOFUs.

REMOTE_FILES="https://tails.net/tails-signing.key"

CURL="/usr/bin/curl"
WGET="/usr/bin/wget --retry-on-host-error --retry-connrefused"
PYTHON="/usr/bin/python3"

# in tails, we must torify
if [[ "`whoami`" == "amnesia" ]] ; then
	CURL="/usr/bin/torify ${CURL}"
	WGET="/usr/bin/torify ${WGET}"
	PYTHON="/usr/bin/torify ${PYTHON}"
fi

tmpDir=`mktemp -d`
pushd "${tmpDir}"

# first get some info about our internet connection
${CURL} -s https://ifconfig.co/country | head -n1
${CURL} -s https://check.torproject.org | grep Congratulations | head -n1

# and today's date
date -u +"%Y-%m-%d"

# get the file
for file in ${REMOTE_FILES}; do
	wget ${file}
done

# checksum
date -u +"%Y-%m-%d"
sha256sum *

# gpg fingerprint
gpg --with-fingerprint  --with-subkey-fingerprint --keyid-format 0xlong *

Here's one example execution of the above script (on a debian DispVM, executed with a VPN).

/tmp/tmp.xT9HCeTY0y ~
Canada
2024-05-04
--2024-05-04 14:58:54--  https://tails.net/tails-signing.key
Resolving tails.net (tails.net)... 204.13.164.63
Connecting to tails.net (tails.net)|204.13.164.63|:443... connected.
HTTP request sent, awaiting response... 200 OK
Length: 1387192 (1.3M) [application/octet-stream]
Saving to: ‘tails-signing.key’

tails-signing.key   100%[===================>]   1.32M  1.26MB/s    in 1.1s    

2024-05-04 14:58:56 (1.26 MB/s) - ‘tails-signing.key’ saved [1387192/1387192]

2024-05-04
8c641252767dc8815d3453e540142ea143498f8fbd76850066dc134445b3e532  tails-signing.key
gpg: WARNING: no command supplied.  Trying to guess what you mean ...
pub   rsa4096/0xDBB802B258ACD84F 2015-01-18 [C] [expires: 2025-01-25]
      Key fingerprint = A490 D0F4 D311 A415 3E2B  B7CA DBB8 02B2 58AC D84F
uid                             Tails developers (offline long-term identity key) <[email protected]>
uid                             Tails developers <[email protected]>
sub   rsa4096/0x3C83DCB52F699C56 2015-01-18 [S] [expired: 2018-01-11]
sub   rsa4096/0x98FEC6BC752A3DB6 2015-01-18 [S] [expired: 2018-01-11]
sub   rsa4096/0xAA9E014656987A65 2015-01-18 [S] [revoked: 2015-10-29]
sub   rsa4096/0xAF292B44A0EDAA41 2016-08-30 [S] [expired: 2018-01-11]
sub   rsa4096/0xD21DAD38AF281C0B 2017-08-28 [S] [expires: 2025-01-25]
sub   rsa4096/0x3020A7A9C2B72733 2017-08-28 [S] [revoked: 2020-05-29]
sub   ed25519/0x90B2B4BD7AED235F 2017-08-28 [S] [expires: 2025-01-25]
sub   rsa4096/0xA8B0F4E45B1B50E2 2018-08-30 [S] [revoked: 2021-10-14]
sub   rsa4096/0x7BFBD2B902EE13D0 2021-10-14 [S] [expires: 2025-01-25]
sub   rsa4096/0xE5DBA2E186D5BAFC 2023-10-03 [S] [expires: 2025-01-25]

The TOFU output above shows that the release signing key from the TAILS project is a 4096-bit RSA key with a full fingerprint of "A490 D0F4 D311 A415 3E2B B7CA DBB8 02B2 58AC D84F". The key file itself has a sha256 hash of "8c641252767dc8815d3453e540142ea143498f8fbd76850066dc134445b3e532".

When doing a 3TOFU, save the output of each execution. After collecting output from all 3 executions (intentionally spread-out over 3 days or more), diff the output.

If the output of all three TOFUs match, then the confidence of the file's authenticity is very high.

Why do 3TOFU?

Unfortunately, many developers think that hosting their releases on a server with https is sufficient to protect their users from obtaining a maliciously-modified release. But https won't protect you if:

  1. Your DNS or publishing infrastructure is compromised (it happens), or
  2. An attacker has just one (subordinate) CA in the user's PKI root store (it happens)

Generally speaking, publishing infrastructure compromises are detected and resolved within days and MITM attacks using compromised CAs are targeted attacks (to avoid detection). Therefore, a 3TOFU verification should thwart these types of attacks.

⚠ Note on hashes: Unfortunately, many well-meaning developers erroneously think that cryptographic hashes provide authenticity, but cryptographic hashes do not provide authenticity -- they provide integrity.

Integrity checks are useful to detect corrupted data on-download; it does not protect you from maliciously altered data unless those hashes are cryptographically signed with a key whose private key isn't stored on the publishing infrastructure.

Improvements

There are some things you can do to further improve the confidence of the authenticity of a file you download from the internet.

Distinct Domains

If possible, download your payload from as many distinct domains as possible.

An adversary may successfully compromise the publishing infrastructure of a software project, but it's far less likely for them to compromise the project website (eg 'tails.net') and their forge (eg 'github.com') and their mastodon instance (eg 'mastodon.social').

Use TAILS

TAILS Logo
TAILS is by far the best OS to use for security-critical situations.

If you are a high-risk target (investigative journalist, activist, or political dissident) then you should definitely use TAILS for one of your TOFUs.

Signature Verification

It's always better to verify the authenticity of a file using cryptographic signatures than with 3TOFU.

Unfortunately, some companies like Microsoft don't sign their releases, so the only option to verify the authenticity of something like a Windows .iso is with 3TOFU.

Still, whenever you encounter some software that is not signed using an offline key, please do us all a favor and create a bug report asking the developer to sign their releases with PGP (or minisign or signify or something).

4TOFU

3TOFU is easy because Tor is free and most people have access to a VPN (corporate or commercial or an ssh socks proxy).

But, if you'd like, you could also add i2p or some other proxy network into the mix (and do 4TOFU).


After almost 2 years, Privacy Guides has added a new Hardware Recommendations section to their website.

Thanks to Daniel Nathan Gray and others for implementing this new hardware guide


After almost 2 years, Privacy Guides has added a new Hardware Recommendations section to their website.

Thanks to Daniel Nathan Gray and others for implementing this new hardware guide


After almost 2 years, Privacy Guides has added a new Hardware Recommendations section to their website.

Thanks to Daniel Nathan Gray and others for implementing this new hardware guide


After almost 2 years, Privacy Guides has added a new Hardware Recommendations section to their website.

Thanks to Daniel Nathan Gray and others for implementing this new hardware guide

[–] [email protected] 20 points 7 months ago* (last edited 7 months ago) (1 children)

Hi, Michael Altfield here. I was the sysadmin for OSE from 2017-2020.

Everything OSE does is transparent, so you can just check the OSE websites to see what everyone is currently working-on. OSE contributors log their hours in a worklog called "OSE Dev". There you can quickly see who is working on what.

The above graphs show 4 contributors in the past ~10 weeks (one is me; we had some issues with the apache config recently). There's no direct link, but you can then check the wiki to see people's work logs (just search for the person's name and Log):

I also like to look at the MediaWiki "Recent Changes" page to peak at what people are up-to as well:

I told Marcin about Lemmy back in June 2023. Another OSE contributor even created an OSE community on the slrpnk.net instance, but it appears to have been abandoned. I'll email him about this thread to see if he'll bite and publish updates in this community since there's clearly interest :)

Also, shameless plug: I started an org that's very similar in spirit to OSE called Eco-Libre, with a focus on projects to sustainably enfranchise human rights in smaller communities. We're currently accepting volunteers ;)

[–] [email protected] 1 points 8 months ago* (last edited 8 months ago)

Personally I wouldn't run a lemmy instance because of this (and also many other concerns)

I recommend [a] letting the lemmy devs know (eg on GitHub) that this issue is preventing you from running a lemmy instance and [b] donating to alternative projects that actually care about data privacy rights.

[–] [email protected] 1 points 8 months ago* (last edited 8 months ago)

The fines usually are a percent of revenue or millions of Euros, whichever is higher.

So if your revenue is 0 EUR then they can fine you the millions of Euros instead. The point of the “percent of revenue” alternative was for larger corporations that can get fined tens or hundreds of millions of Euros (or, as it happened to Meta, in some cases -- billions of Euros for a single GDPR violation).

[–] [email protected] 1 points 8 months ago (1 children)

That would be true if their instance wasn't federating. If the instance is federating, then it's downloading content from other users, even if the user isn't registered on the instance. And that content is publicly available.

So if someone discovers their content on their instance and sends them a GDPR request (eg Erasure), then they are legally required to process it.

[–] [email protected] 1 points 8 months ago

It's definitely not impossible to contact all instances; it's a finite list. But we should have a tool to make this easier. Something that can take a given username or post, do a search, find out all the instances that it federated-to, get the contact for all of those instances, and then send-out a formal "GDPR Erasure Request" to all of the relevant admins.

[–] [email protected] 0 points 8 months ago* (last edited 8 months ago) (1 children)

Did you read the article and the feedback that you've received from your other users?

Any FOSS platform has capacity issues. I run my own FOSS projects with zero grant funds and where I'm the only developer. I understand this issue.

What we're talking about here is prioritization. My point is that you should not prioritize "new features" when existing features are a legal, moral, and grave financial risk to your community. And this isn't just "my priority" -- it's clearly been shown that this is the desired priority of your community.

Please prioritize your GDPR issues.

[–] [email protected] 2 points 8 months ago (1 children)

Very nice. Unfortunately it doesn't look like Boost is available on F-Droid.

[–] [email protected] 4 points 8 months ago

Fortunately, in my case, my image was "orphaned" and never actually attached to a post or comment, so it wouldn't have federated.

If the image has already federated then that's a whole next level problem :(

[–] [email protected] 0 points 8 months ago (2 children)

Unfortunately, the Lemmy devs literally said it would take years to fix this issue. If you think this should be a priority for them, please advocate for them to prioritize it on GitHub.

[–] [email protected] 9 points 8 months ago* (last edited 8 months ago) (3 children)

Hi, unfortunate author here 😅

The issue happened in Jerboa. I opened a few tickets in the Jerboa app's GitHub to address this:

Can you please tell us which Lemmy client apps you use that store the delete token and have a UI to delete uploaded images?

view more: next ›