TDCN

joined 1 year ago
[–] [email protected] 0 points 2 days ago (3 children)

Oplad ikke på steder, hvor en evt. brand kan spærre for flugtveje som døre eller trapper.

👀 Mig som oplader lige ved hoveddøren...

[–] [email protected] 10 points 4 days ago

Had the same experience when I tried it the other day. I can now actually manage to draw up something without being completely lost in broken constraints and confusion workbenches. I actually managed to finish my idea but it took way longer than I usually use in other cad, but all beginnings are hard. Although It's nice to see that it's improving to a point where it's actually a viable option for me.

[–] [email protected] 8 points 1 week ago

It is also just as much an issue that all the problems AVs are trying to solve are 100% self inflicted due to how the infrastructure is build. Its not solving the root problem at all that is the car dependency.

[–] [email protected] 0 points 2 weeks ago

Jeg ville ønske at dette var et muligt valg på kommunens hjemmeside.

[–] [email protected] 0 points 3 weeks ago* (last edited 3 weeks ago) (1 children)

Hmm autogenerer ny konto... Jeg kan umuligt forestille mig at dr's backend er særligt sofistikeret.

En anden mulighed er at man har en "personlig konto" men appen vil i baggrunden (via api) gå ind og "se" samtlige programmer eller alt muligt random for at opfuskere hvad du faktisk ser. Vi vælter sikker deres servere men det må være deres hovedpine.

[–] [email protected] 0 points 3 weeks ago (3 children)

Hvor nemt vil det være at lave en app som bruger et fælles login (en dummy bruger vi alle kan logge ind på) og så streame derfra, men appen vil så holde styr på data for mig lokalt i en cookie eller csv fil så man ikke behøver at dele sin data med DR. "Poison the data"

[–] [email protected] 3 points 3 weeks ago* (last edited 3 weeks ago)

Well all i can say is that every time my bike was stolen it was locked with a heavy duty chain, or in a locked basement, or in a locked cage-room in the basment so the thieves have no chill. My biggest mistake was probably that it wasnt locked to an immovable solid pole in the ground but you cannot always find that whereever you need to park, and a thin bikerack that is the only thing you can find in the city is so easy to cut open for thieves that they'll cut that instead of the lock so no lock will help here either. Thieves are lazy so making it look like it'll take hours to make the bike resellable is the only true option together with a heavy duty chain like the abus city chain x-plus

[–] [email protected] 5 points 3 weeks ago (2 children)

This is drastisc i know, but it works: lots of electrical tape spray paint, coffee grounds, sawdust and more spray paint. Be sure to tape/paint over all brand names and emblems so the bike looses its identity. Put random pieces of ducttape on a few cables and gear changer. Never wash it and always leave it a bit dusty. Basically make it look like garbage and not worth the effort. It should look unsellable. I did this after having 3 bikes stolen within a year. Now i can hopefully have it a bit longer. Protip: use foil paint /plastic dip so its technically reversible.

[–] [email protected] 0 points 3 weeks ago

Det var også skrevet mest for at sætte det på spidsen, men jeg kender i bud og grund at det nok er meget få som ønsker at deltage hvis der bliver spurgt, så de spørger helt sikkert ikke om samtykke da der ellers ikke er materiale nok til noget meningsfuldt træning. At der ikke bliver spurgt er totalt fucked.

[–] [email protected] 0 points 3 weeks ago (2 children)

Jeg forestiller mig lige det brev man i så fald vil modtage i e-box...

Hej vi har stadig en hel masse video og billedmateriale af dig da du blev misbrugt og forulempet liggende på vores server. Der vil vi så gerne bruge til at skabe en AI så vi kan gerenre en hel masse mere materiel som vi kan give til de kriminelle og så vi måske måske kan fange dem, men vi er ikke sikre på at det vil virke. Er du okay med at vi bruger al det video materiale vi har af dig? Skriv under her...

Ej det tror jeg sku ikke
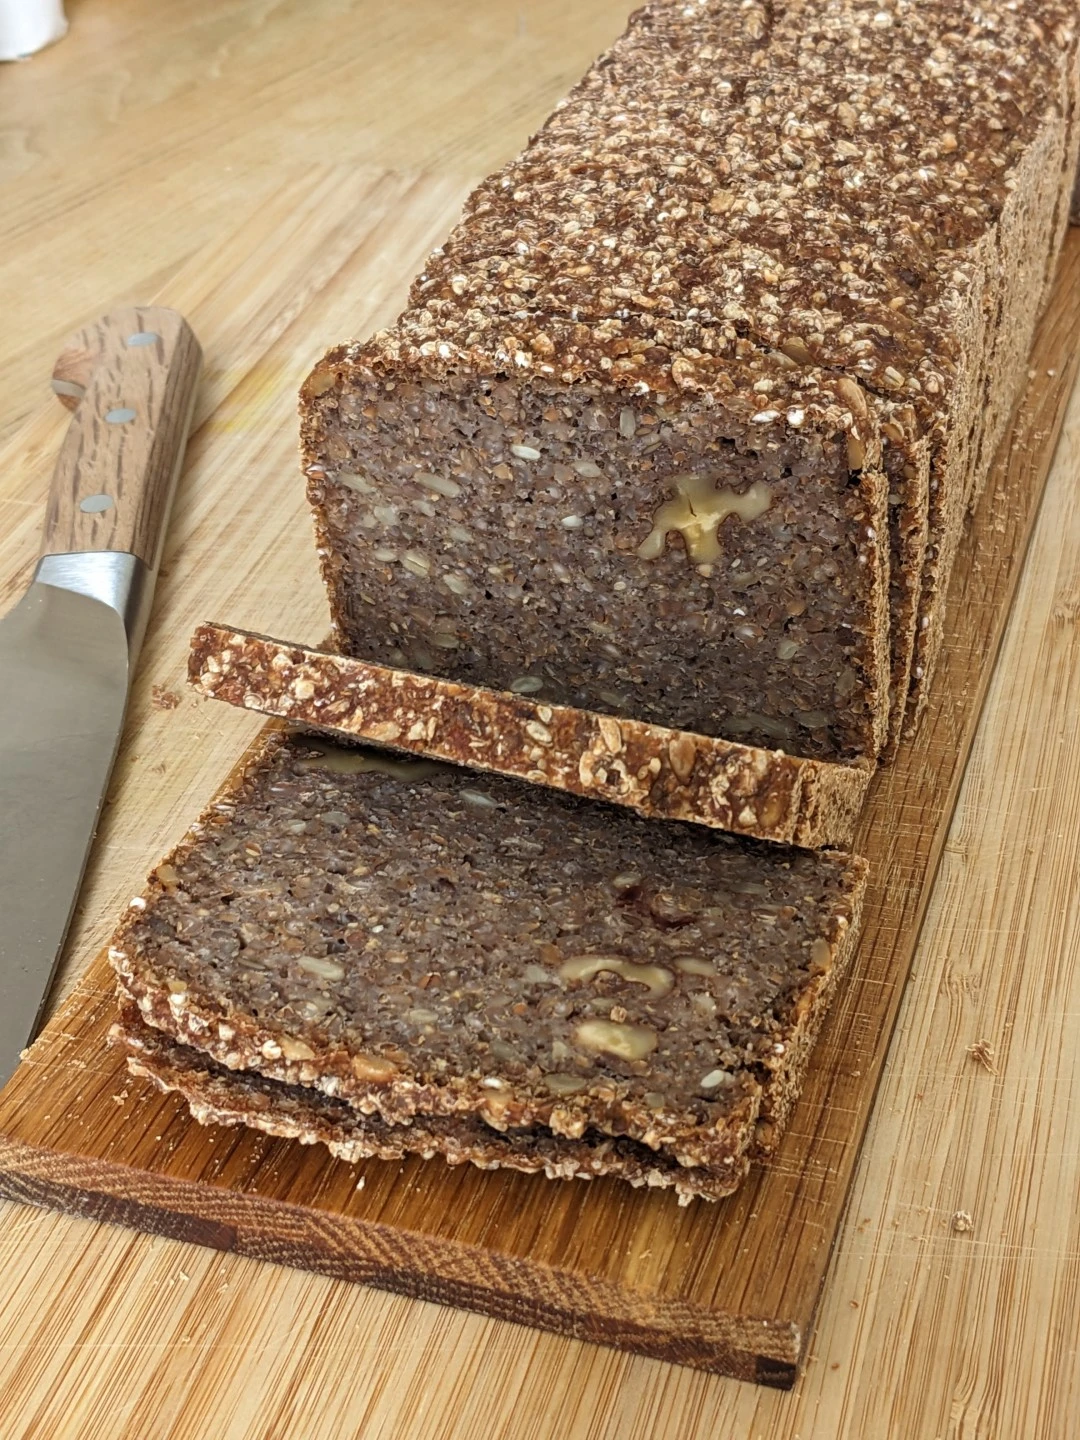
 

Danish rye bread, known as "rugbrød," is a staple in Danish cuisine, renowned for its dense texture and rich, slightly tangy flavour. My recipe however is on the milder side and is probably more palatable to people from outside Denmark. This bread is packed with whole grains and seeds, making it not only delicious but also nutritious. Unlike lighter, airier wheat breads, Danish rye bread has a robust, chewy consistency that pairs perfectly with a variety of toppings. It's commonly enjoyed as an open-faced sandwich, topped with an array of ingredients such as cold cuts, cheeses, smoked fish, eggs, fresh vegetables, or simply just a good layer of butter. Whether for breakfast, lunch, or as a snack, Danish rye bread provides a satisfying and wholesome base for any meal.

I hope this recipe will work for you, and please let me know if the bread doesn't turn out well, as the recipe always works perfectly for me every single time. I buy flour at the local discount food store, but I've used many different brands, and it still works just as well.

Good luck and feel free to send pictures of your results.

Link to original post in danish

Everyday Rye Bread with Lots of Seeds

Ingredients

the recipe is for a single loaf of rye bread fitting a 3L bread pan

  • 10 g fresh yeast (3g dry i think)

  • 3 dl buttermilk/kefir/yoghurt or whatever you have on hand.

  • 5 dl water

  • Juice of 1 lemon

  • 12g salt

  • 365 g rye kernels

  • 200 g wheat flour

  • 270 g rye flour

  • 315 g additional seeds, mix as you like, e.g.

    • 90g flaxseeds
    • 90g sunflower seeds
    • 90g walnuts
    • 45g chia seeds

For the additional seeds, you can instead also use:

  • A handful of cranberries
  • Wheat kernels
  • Pearl barley
  • Chopped almonds
  • Hazelnuts
  • Oats

Mixing

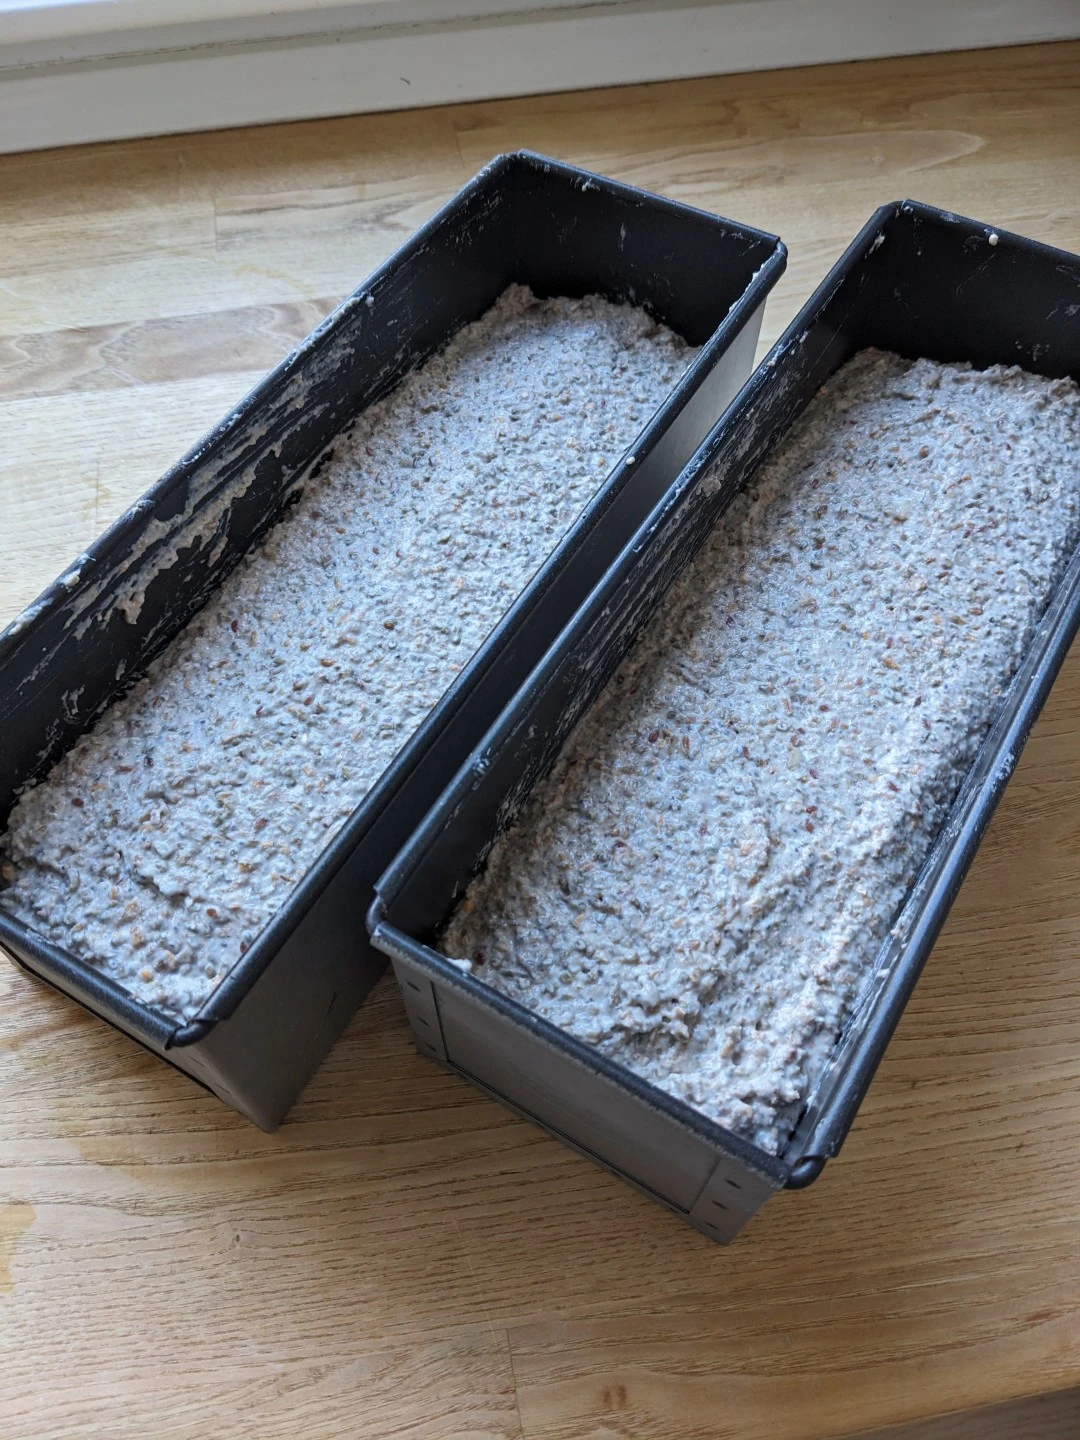
Dissolve the yeast in the wet ingredients and then add the rest of the ingredients. Mix everything well for 10 minutes on the machine. If you don't have a mixer, you can stir it by hand in a large bowl with a wooden spoon/spatula. Then pour the dough directly into a 3-liter bread pan. After the dough is in the bread pan, smooth the surface with a wet spatula or fingers. If you like, you can sprinkle some seeds on top as decoration (I usually dont).

Cold Rising

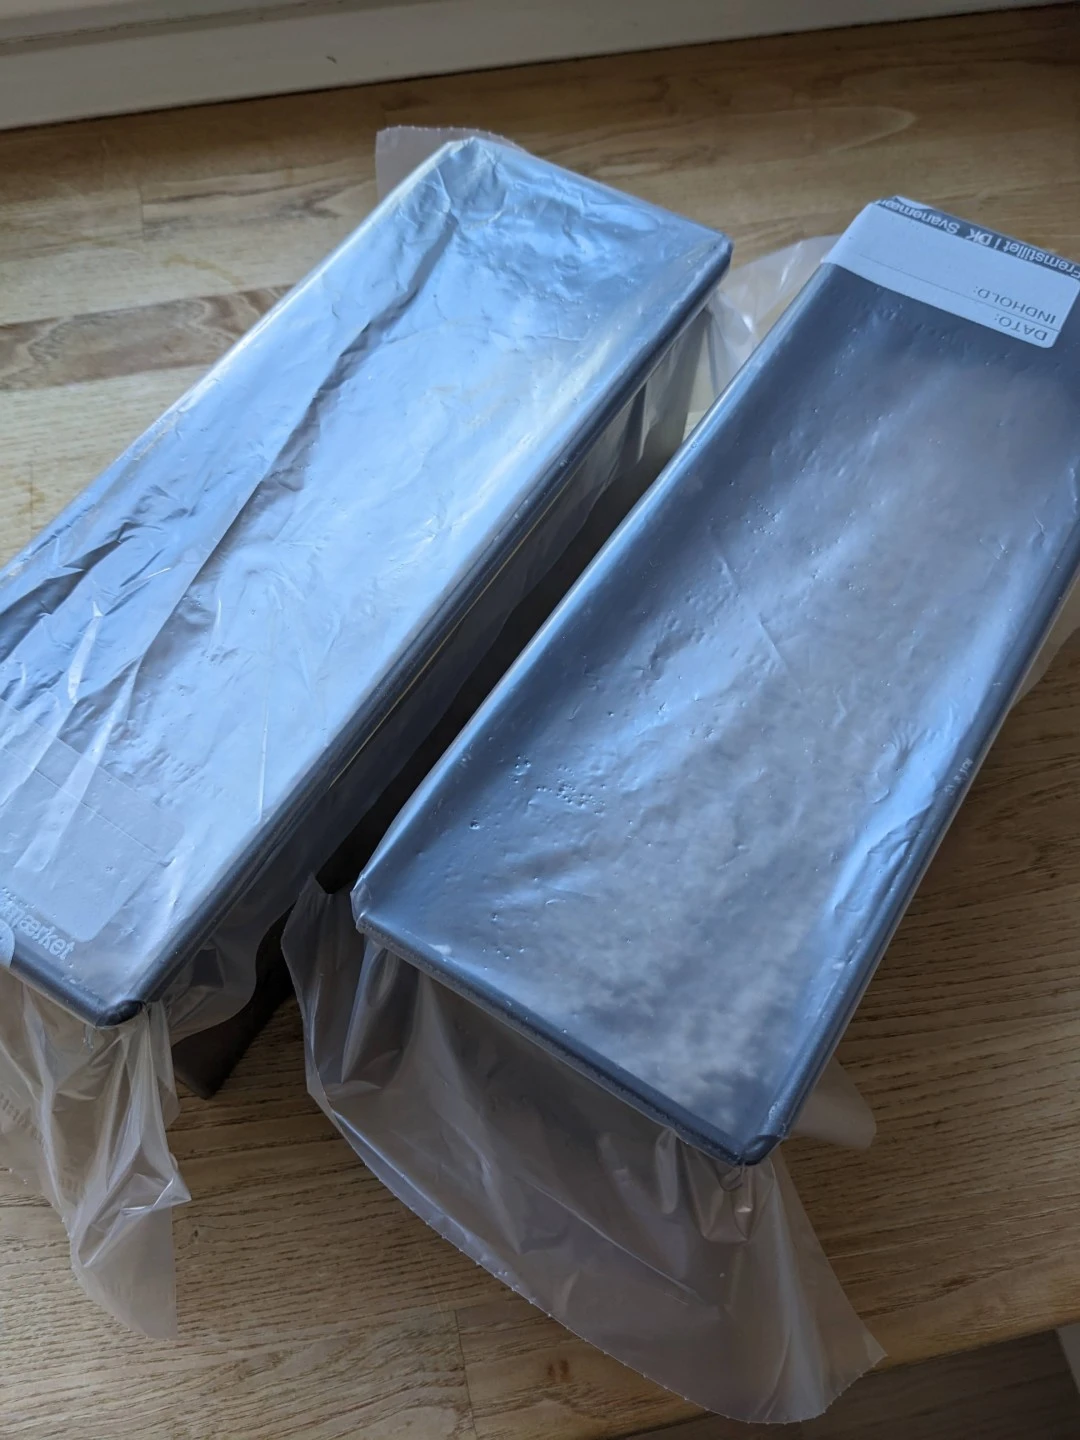
Cover the bread pan with an 8L plastic bag and an elastic band, or use cling film. Place in the refrigerator for 12 - 24 hours.

If you want to bake the same day, you can use about 15 g of yeast and let the dough rise at room temperature for about 2 hours instead, but be careful not to let the dough rise too much as it happens much faster than in the refrigerator. I generally discourage this as it gives the seeds and kernels less time to absorb the water. Cold rising in the fridge is preferable.

Baking

Take the bread out of the refrigerator 1-3 hours before it is to be baked so it can come to room temperature and finish rising. Keep an eye on the dough and see how quickly it rises, so you can preheat the oven in good time. When the dough is ready, it should preferably go straight into the oven.

The dough is ready when there are 5-10 small pinhead-sized bubbles on the surface. This is not always visible as it depends a bit on the flour, but otherwise, 2 hours is usually enough. Generally don't let it stay for more than 2 hours, especially if you live in a hot climate.

Preheat the oven to 180 degrees and put the bread in when it is ready. No fan. Place the bread on the very bottom rack, as low as possible. Bake the bread for about 1 hour 50 minutes or until the internal temperature of the bread is 96-98 degrees.

Take the bread out of the bread pan immediately after it has finished baking and let it cool on a rack

Remember that ovens can vary, so if the bread, feels a bit soft on the bottom side and slightly under baked, give it another 5-10 minutes in the oven but this time leave it out of the bread pan. If you feel like it takes significantly longer than 1 hour and 40-50 min to bake maybe your oven is a bit colder than mine so raise the temperature 5 degrees next time you bake.

Wait with slicing and plastic baging the bread until it is completely cooled. It can take several hours. You can put a thin tea towel over it while it cools on the rack if you want a softer crust or to protect it a bit while cooling over night.

Enjoy.

Tips

Mix the dough in the evening and put it in the refrigerator until the next day. Then you can take the bread out when you get home from work the next day and bake it durring the evening and have it cool down over night.

When the bread is completely cooled, it can be sliced with a sharp knife (not serrated) and put in a bag in the freezer. When you want to use the bread, the frozen slices can easily be separated with a knife blade and a little push. The slices are toasted in the toaster and eaten warm.

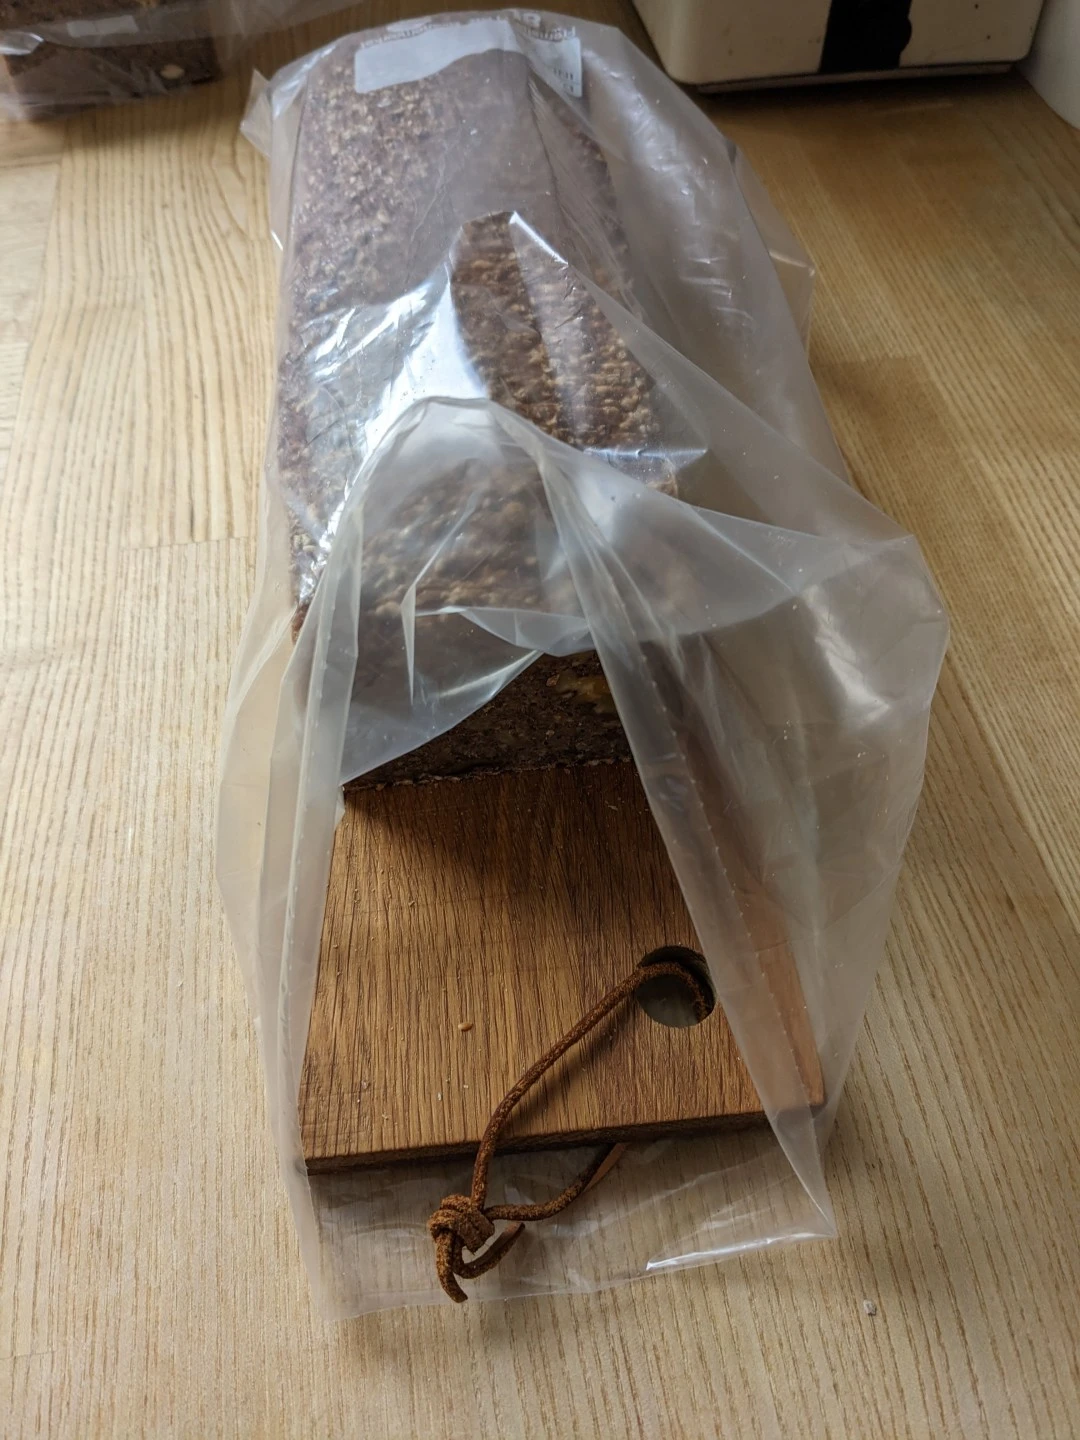
If the bread is sliced on a narrow cutting board, it is much easier to put in a bag as seen in the picture below.


I hope these type of requests are allowed here. Otherwise just let me know and I'll remove my post.

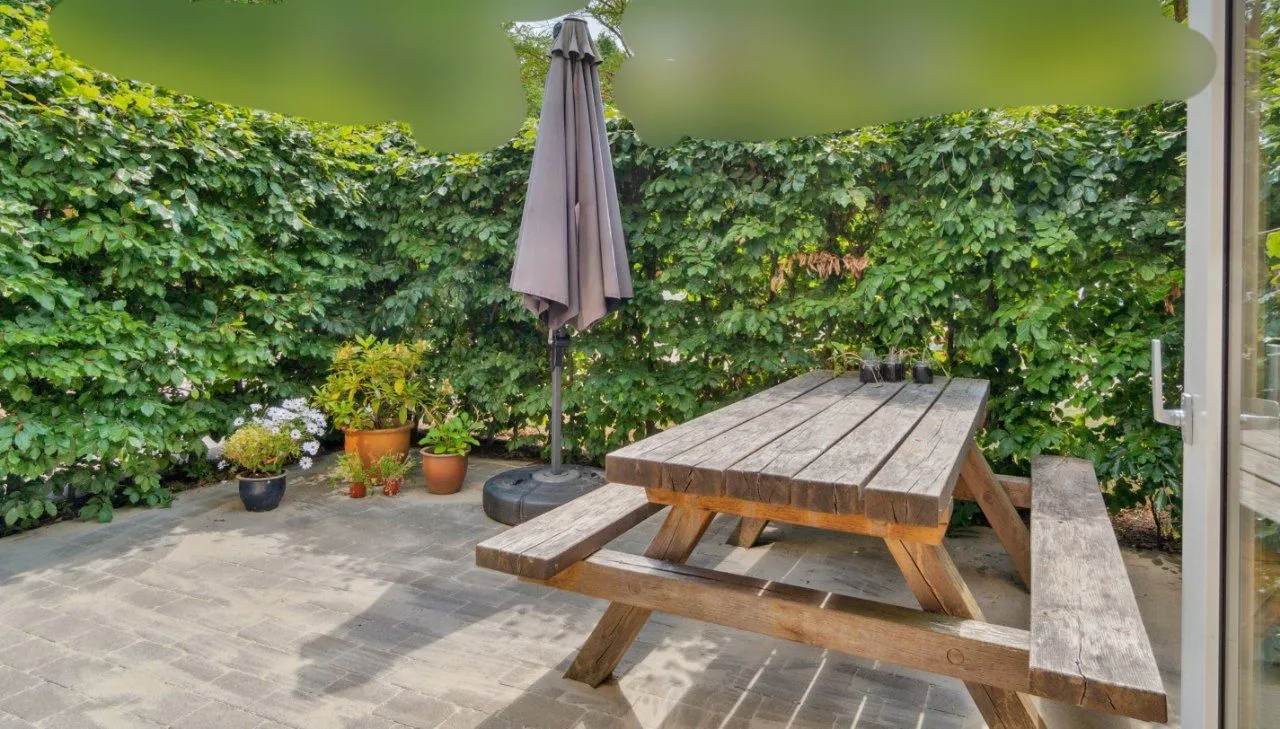
I'm soon moving to a new house and it has a little garden area of 5.5 m wide and 4.4m long. And surrounded by a tall hedge (that I don't want to remove)

At the moment, as you can see on the pictures below, it's all tiled. I initially intended to remove about a third of the tiles and make a mos, clover and wild flowers lawn that my cat and dog can use now and then. Then maybe make some tall planteres for wild herbs from stacking the removed bricks up in a square and adding some wood planks.

But now i got the idea of asking you guys if you have any better ideas for how to use this space for a little sanctuary for me and my pets. I'd love to see some inspiration, sketches or ideas from you on how i get more use out of this space. Maybe removing the tiles is not the best idea?

I live in Denmark so the climate is a bit mixed. I'm not a big gardener type of person so something simple that mostly takes care of itself is ideal. Lavenders, sage, oniongrass types of herbs and Viola tricolor and wild flowers for easy and pretty colors.


Beklager hvis dette er noget som er blevet spurgt om før, men som titlen siger: kan jeg bruge min konto her på feddit til at poste eller interagere med mastodon? Jeg ser ofte opslag her på lemmy postet fra mastodon, men forstår ikke helt hvordan det fungere og om det kan gå den anden vej også.

Går jeg ind på mastodon.social står der tydeligt at jeg ikke kan logge ind her med en konto fra en anden instans, hvilket jeg forventede, men hvad gør jeg så?

Hvis ikke man kan lige nu, er der så nogen som ved om det er noget der arbejdes på, så man måske snart kan? Jeg er nemlig ikke umiddelbart interesseret i at have flere konti spredt ud på andre instanser jeg ikke kender og er tryg med, men måske i kan overbevise mig om at det ikke betyder noget?


A few of you asked for how to do it so here's my guide. This method gives me perfect coffee every time, but your milage may vary so don’t be afraid to experiment.

Grind to filter coffe size or maybe a bit finer. Don’t go to espresso level or it’ll just clog the brewer and burn the coffee. It is generally not super sensitive to grind size so don’t worry too much. If in doubt go corser.

Always, always weigh the coffe! I found that they are actually quite sensitive to the amount of coffe you put in. Ever since a started weighing the beans I’ve never had any issues with it. If you cannot get a nice consistent flow through the entire brew and it begins to sputter too early you most likely filled it too much. So rather than fiddle with the grind size, you should instead fill it a little less next time. This is why you must weigh the beans. I use 12-13g for the 2 cup that you see here, and 28-30g for the 6 cup version. If I go outside that range it won’t brew nicely. It’s that sensitive! Grind size does very little to change this

Finally use hot water. This first of speed up the brew but also makes it easier to control the pressure inside. So pour hot/freshly boiled water in, assemble, and put on a low to medium heat with the lid open so you can see when the coffee comes. When the coffee starts to come through turn it down to low low heat to get a nice, slow and consistent flow. For the 2 cup version it’s about 15-30 seconds and for the big 6 cup version i think it’s about 40-90 seconds. I can’t remember exactly so don’t worry too much as long as it’s consistent and nice and slow.

Pour the coffee immediately. Otherwise it’ll slowly burn and turn bitter in the hot brewer. If you want to share the portion stir it a bit first since its much stronger at the bottom.

With this method i always get amazing coffee out of this little machine and i low it so much.

The milk i just heated with the Bialetti electric milk foamer but a little pot and a whisk would do the same. Don't heat the milk too much. It should only be around 65 degrees or something like that or it changes the taste. For UHT treated milk i guess this doesn't matter.

I hope this was helpful. So enjoy your coffee.

Additional debugging steps:

If you use a blade grinder: This is fine, and I’ve used one for years when I was a student and it worked just fine as well. You can grind pretty fine with that for the mokka pot. It's difficult to go too fine, but again, if on doubt go corser. Much more importantly is to avoid clumps. Blade grinders tends to make clumps so try to stir them out a bit with a needle/scewer or a very thin fork.

Clumps causes channeling and easily makes it sputter and all the water goes through too fast since it cannot build the pressure needed to make a consistent flow.

Clogging causes it to go really slow and sputter almost immediately and it seems like not all the water wants to go through. This is because it builds up too much heat and pressure so when the coffee passed through the coffee it's above 100C° so it instantly boils when it reaches the other side and gives a very harsh amd unpleasant taste.

Oh I forgot to add. FOR THE LOVE OF GOD CLEAN YOU MOKKA POT WITH SOAP! Don't be fooled by what others are saying. It's not building up "flavour" it is literally old and rancid coffee "flavours" you are building up. So please please clean you pot with soap and a soft sponge every single time.


Kumpir is a traditional Turkish streetfood wich is based on a baked potato with cheese and toppings. In this case, the inside of the potato is mixed and mashed heavily with Gouda cheese and topped with olives, sweet corn, roasted sausage pieces, and salty pickles. Dressed with ketchup and mayo. Many different types of toppings exists, so very easy to make as you like.

view more: next ›